Blitz Sora (talk | contribs) (Adding categories) |
No edit summary Tag: Source edit |
||
| (128 intermediate revisions by 15 users not shown) | |||
| Line 1: | Line 1: | ||
| + | [[File:World cards menu from RCOM.png|thumb|World cards menu in ''Re:Chain of Memories''.]] |
||
| − | {{game|COM|REC|KHC|RCO}} |
||
| + | [[File:World cards menu from COM.png|thumb|World cards menu in ''Chain of Memories''.]] |
||
| − | {{expand|create=''Kingdom Hearts coded'' information, Halloween Town Mickey and Riku images}} |
||
| + | '''World cards''' are a type of [[Cards (Chain of Memories)|card]] in ''[[Kingdom Hearts: Chain of Memories|Chain of Memories]]'' and its remake ''[[Kingdom Hearts Re:Chain of Memories|Re:Chain of Memories]]'', as well as ''[[Kingdom Hearts Coded|Kingdom Hearts Coded]]''. They are created from the memories of people and can be used to transform floors from [[Castle Oblivion]] into the relevant world, although traversing through the floor still requires [[map cards]]. Almost all world cards are made by members of [[Organization XIII]], although [[DiZ]] and [[Naminé]] were also able to make cards for [[Riku]], and one appeared on its own to [[Mickey Mouse|King Mickey]]. Naminé could also use her powers to turn a world card into another object, as she did with the card for [[Destiny Islands]] that was in [[Riku Replica]]'s possession as a charm. |
||
| − | [[File:World Card.png|thumb|A blank World Card.]] |
||
| − | '''World Cards''' are a type of map card in ''[[Kingdom Hearts: Chain of Memories]]'' which can transform floors of [[Castle Oblivion]] into entire worlds made out of [[Sora]] or [[Riku]]'s memories. These cards are usually created by members of the [[Organization XIII|Organization]], but [[Ansem the Wise|DiZ]] and [[Naminé]] are both able to make cards for Riku, and one appears on its own to King Mickey. Naminé is even able to fashion these cards into trinkets, as she does for the Riku Replica. |
||
| + | In ''[[Kingdom Hearts coded|coded]]'' and [[Kingdom Hearts Re:coded|''Re:coded'']], Castle Oblivion is remade in data form, and the world cards are still present, along with the [[Ending Card]]s. |
||
| − | The World Cards are not all available at once. In "Sora's Story", Sora receives the Traverse Town card from [[Marluxia]], the Wonderland, Olympus Coliseum, Agrabah, Halloween Town, and Monstro cards from [[Axel]], the Atlantica, Neverland, Hollow Bastion, and 100 Acre Wood cards from [[Larxene]], the Twilight Town card from [[Vexen]], and the Destiny Islands card from the [[Riku Replica]]. |
||
| + | ==History== |
||
| − | In "Reverse/Rebirth", Riku receives the Hollow Bastion card from [[Ansem the Wise|DiZ]], the Traverse Town, Agrabah, Monstro, and Neverland cards from [[Ansem, Seeker of Darkness|Ansem]], then the Atlantica, Halloween Town, Olympus Coliseum, and Wonderland cards from Ansem again, the Destiny Islands card from [[Zexion]], the Twilight Town card from [[Mickey Mouse|the King]], and the Castle Oblivion card from DiZ. |
||
| + | ===''Chain of Memories''=== |
||
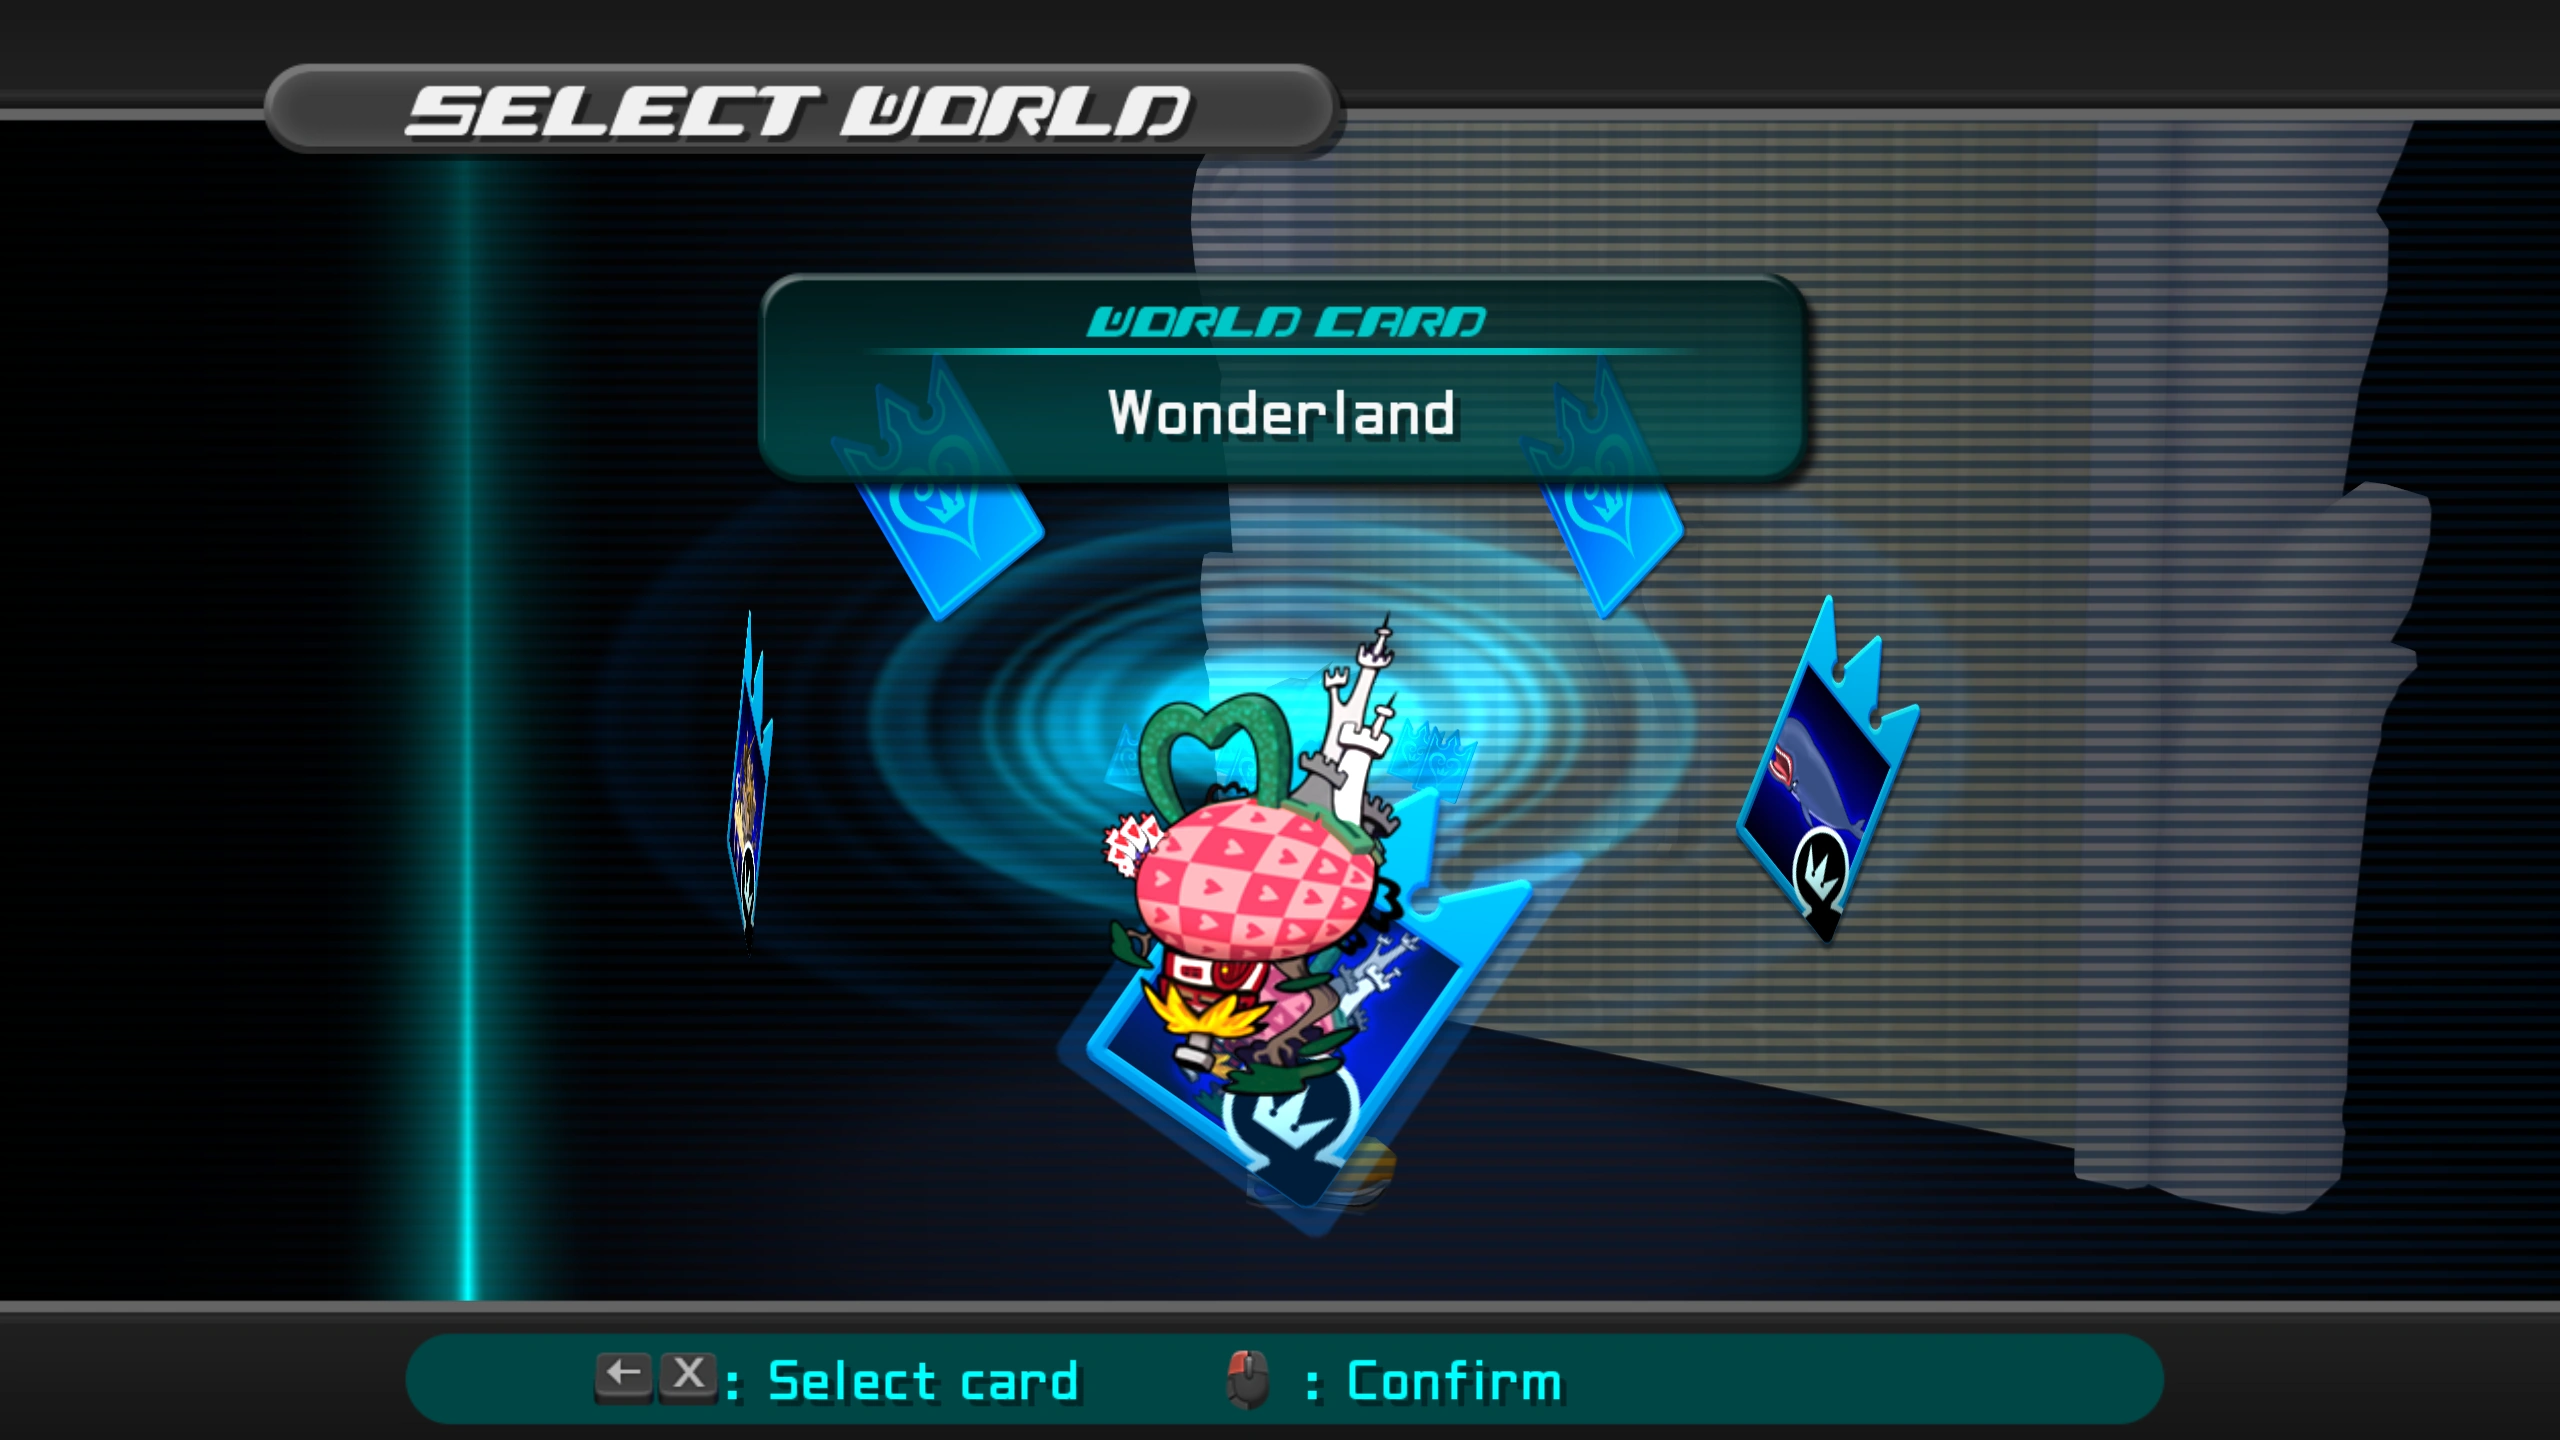
| + | The first card introduced in ''Chain of Memories'' was the [[Traverse Town]] world card, produced by a hooded [[Marluxia]] who sampled [[Sora]]'s memories to make it. After completing and exiting Traverse Town they met with Marluxia again, until they were interrupted by [[Axel]], with the intent to test them. Axel granted them several more world cards ([[Wonderland]], [[Olympus Coliseum]], [[Agrabah]], [[Monstro]], and [[Halloween Town]]) upon his defeat, as did [[Larxene]] ([[100 Acre Wood]], [[Atlantica]], [[Neverland]], [[Hollow Bastion]]) whom they encountered on the sixth floor. |
||
| + | Meanwhile, the [[Organization XIII|organization]] members planning a coup used [[Naminé]]'s ability to turn the [[Destiny Islands]] world card into a fake charm for [[Riku Replica]]. Vexen later samples the memories of [[Roxas]] through Sora's heart to create a world card for [[Twilight Town]]. The last world card Sora acquired is [[Destiny Islands]], after the final defeat of [[Riku Replica]], when his fake charm returned to normal when in Sora's possession. Lastly, he entered the 13th floor of Castle Oblivion without a world card |
||
| − | ==List of World Cards== |
||
| − | ===Traverse Town=== |
||
| − | {|class="wikitable" width="100%" |
||
| − | |- bgcolor="#6495ED" |
||
| − | |rowspan="2" width="10%" style="text-align:center"|'''World''' |
||
| − | |rowspan="2" width="25%" style="text-align:center"|'''Description''' |
||
| − | |style="text-align:center"|'''Cards''' |
||
| − | |colspan="2" style="text-align:center"|'''Treasures''' |
||
| − | |rowspan="2" width="25%" style="text-align:center"|'''Journal''' |
||
| − | |- bgcolor="#6495ED" |
||
| − | |width="20%" style="text-align:center"|'''Enemy Card{{RR}}''' |
||
| − | |width="10%" style="text-align:center"|'''Bounty''' |
||
| − | |width="10%" style="text-align:center"|'''Reward''' |
||
| − | |- bgcolor="#E6E6FA" |
||
| − | |rowspan="3" style="text-align:center"|[[File:Traverse Town 2 (card).png]]<br><small>'''[[Traverse Town#Kingdom Hearts: Chain of Memories|Traverse Town]]'''</small> |
||
| − | |rowspan="3"|''A haven for those whose homes fell to darkness.''<br> |
||
| − | <small>Can be used on: |
||
| − | *'''Sora's Story''': Floor 1 |
||
| − | *'''Reverse/Rebirth''': Basement floors 11 through 8</small> |
||
| − | |style="text-align:center"|[[File:Shadow (card).png]]<br><small>'''[[Shadow]]'''</small> |
||
| − | |style="text-align:center"|[[File:Hidden Dragon (card).png]]<br><small>'''[[Hidden Dragon]]'''</small> |
||
| − | |style="text-align:center"|[[File:Simba (card).png]]<br><small>'''[[Simba]]'''</small> |
||
| − | |rowspan="3"|<small>''The card the hooded man gave us took us to Traverse Town, where we were reunited with Leon, Yuffie, and our other friends.<br><br>Leon acted like he'd forgotten Sora, but for whatever reason still knew his name. I guess his memory got mixed up somehow.<br><br>Aerith sensed that the town and everyone there was a product of Sora's memories. It may sound crazy, but I think she was right.''</small> |
||
| − | |- bgcolor="#6495ED" |
||
| − | |style="text-align:center"|'''Boss Card''' |
||
| − | |style="text-align:center"|'''Bonus 1''' |
||
| − | |style="text-align:center"|'''Bonus 2''' |
||
| − | |- bgcolor="#E6E6FA" |
||
| − | |style="text-align:center"|[[File:Guard Armor (card).png]]<br><small>'''[[Guard Armor]]'''</small> |
||
| − | |style="text-align:center"|[[File:Lionheart (card).png]]<br><small>'''[[Lionheart]]'''</small> |
||
| − | |style="text-align:center"|[[File:Saïx (card).png]]<br><small>'''[[Saïx]]'''</small> |
||
| − | |- bgcolor="#6495ED" |
||
| − | |colspan="2" style="text-align:center"|'''Characters''' |
||
| − | |colspan="4" style="text-align:center"|'''Enemies''' |
||
| − | |- bgcolor="#E6E6FA" |
||
| − | |colspan="2" style="text-align:center"|<gallery widths="30px" heights="50px" perrow="4"> |
||
| − | File:Leon KH1.png|[[Leon]] |
||
| − | File:Yuffie KH.png|[[Yuffie]] |
||
| − | File:Aerith KH.png|[[Aerith]] |
||
| − | File:Cid KHREC.png|[[Cid]] |
||
| − | </gallery> |
||
| − | |colspan="4" style="text-align:center"|<gallery widths="30px" heights="50px" perrow="7"> |
||
| − | File:Leon KH1.png|'''[[Leon (Boss)|Leon]]''' |
||
| − | File:Shadow (KHII).png|[[Shadow]] |
||
| − | File:Soldier KH2.png|[[Soldier]] |
||
| − | File:Red Nocturne.png|[[Red Nocturne]] |
||
| − | File:Blue Rhapsody.png|[[Blue Rhapsody]] |
||
| − | File:Guard Armor.PNG|'''[[Guard Armor]]''' |
||
| − | File:Cloak.png|'''[[Marluxia (Boss)|Marluxia]]''' |
||
| − | </gallery> |
||
| − | |} |
||
| + | During these events [[Riku]] is taken to Castle Oblivion through a [[Hollow Bastion]] world card thanks to [[DiZ]], who pretended to be [[Ansem]]. DiZ, disguised as Ansem, taught him about his own card mechanics, before he gave him another set of world cards. DiZ later gave him another set in the entrance hall of the seventh basement floor. Riku later acquired additional world cards from [[Mickey Mouse|King Mickey]] and [[Zexion]], for Twilight Town and Destiny Islands, respectively. DiZ also gave him the Castle Oblivion card for the final basement floor, which Sora did not require on his own final floor. |
||
| − | ===Wonderland=== |
||
| − | {|class="wikitable" width="100%" |
||
| − | |- bgcolor="#6495ED" |
||
| − | |rowspan="2" width="10%" style="text-align:center"|'''World''' |
||
| − | |rowspan="2" width="25%" style="text-align:center"|'''Description''' |
||
| − | |colspan="2" style="text-align:center"|'''Cards''' |
||
| − | |colspan="2" style="text-align:center"|'''Treasures''' |
||
| − | |rowspan="2" width="25%" style="text-align:center"|'''Journal''' |
||
| − | |- bgcolor="#6495ED" |
||
| − | |width="10%" style="text-align:center"|'''Friend Card{{SS}}''' |
||
| − | |width="10%" style="text-align:center"|'''Enemy Card{{RR}}''' |
||
| − | |width="10%" style="text-align:center"|'''Bounty''' |
||
| − | |width="10%" style="text-align:center"|'''Reward''' |
||
| − | |- bgcolor="#E6E6FA" |
||
| − | |rowspan="3" style="text-align:center"|[[File:Wonderland 2 (card).png]]<br><small>'''[[Wonderland#Kingdom Hearts: Chain of Memories|Wonderland]]'''</small> |
||
| − | |rowspan="3"|''A magical land full of eccentric residents.''<br> |
||
| − | <small>Can be used on: |
||
| − | *'''Sora's Story''': Floors 2 through 6 |
||
| − | *'''Reverse/Rebirth''': Basement floors 7 through 4</small> |
||
| − | |style="text-align:center"| |
||
| − | |style="text-align:center"|[[File:Large Body (card).png]]<br><small>'''[[Large Body]]'''</small> |
||
| − | |style="text-align:center"|[[File:Stop (card).png]]<br><small>'''[[Stop]]'''</small> |
||
| − | |style="text-align:center"| |
||
| − | |rowspan="3"|<small>''When we chased after the White Rabbit, we stumbled upon a trial in progress.<br><br>The Queen of Hearts accused Alice of stealing her memory and sentenced her to death!<br>Angered by the shoddy trial, Sora freed Alice and hunted down the real culprit.<br><br>But even after we bested the Trickmaster, the Queen refused to believe that Alice was innocent.<br><br>Fortunately, Alice's quick thinking pacified the Queen and no one had to lose their head. ''</small> |
||
| − | |- bgcolor="#6495ED" |
||
| − | |style="text-align:center"|'''Attack Card''' |
||
| − | |style="text-align:center"|'''Boss Card''' |
||
| − | |style="text-align:center"|'''Bonus 1''' |
||
| − | |style="text-align:center"|'''Bonus 2''' |
||
| − | |- bgcolor="#E6E6FA" |
||
| − | |style="text-align:center"|[[File:Lady Luck (card).png]]<br><small>'''[[Lady Luck]]'''</small> |
||
| − | |style="text-align:center"|[[File:Card Soldier, Heart (card).png]]<br><small>'''[[Card of Hearts]]'''</small><br>[[File:Card Soldier, Spade (card).png]]<br><small>'''[[Card of Spades]]'''</small><br>[[File:Trickmaster (card).png]]<br><small>'''[[Trickmaster]]'''</small> |
||
| − | |style="text-align:center"|<small>'''[[Stop Raid]]'''</small>{{KHCoM}}<br><small>'''[[Synchro]]'''</small>{{ReCoM}} |
||
| − | |style="text-align:center"|[[File:Xemnas (card).png]]<br><small>'''[[Xemnas]]'''</small> |
||
| − | |- bgcolor="#6495ED" |
||
| − | |colspan="2" style="text-align:center"|'''Characters''' |
||
| − | |colspan="5" style="text-align:center"|'''Enemies''' |
||
| − | |- bgcolor="#E6E6FA" |
||
| − | |colspan="2" style="text-align:center"|<gallery widths="30px" heights="50px" perrow="4"> |
||
| − | File:Alice KHREC.png|[[Alice]] |
||
| − | File:Queen of Hearts KHREC.png|The [[Queen of Hearts]] |
||
| − | File:White Rabbit KHREC.png|[[White Rabbit]] |
||
| − | File:Card of Hearts KHREC.png|[[Card of Hearts]] |
||
| − | File:Card of Spades KHREC.png|[[Card of Spades]] |
||
| − | File:Cheshire Cat KHREC.png|[[Cheshire Cat]] |
||
| − | </gallery> |
||
| − | |colspan="5" style="text-align:center"|<gallery widths="30px" heights="50px" perrow="7"> |
||
| − | File:Card of Hearts KHREC.png|'''[[Queen of Hearts (Boss)|Card of Hearts]]''' |
||
| − | File:Card of Spades KHREC.png|'''[[Queen of Hearts (Boss)|Card of Spades]]''' |
||
| − | File:Shadow (KHII).png|[[Shadow]] |
||
| − | File:Soldier KH2.png|[[Soldier]] |
||
| − | File:Large Body KHII.png|[[Large Body]] |
||
| − | File:Red Nocturne.png|[[Red Nocturne]] |
||
| − | File:CreeperPlant-Artwork.png|[[Creeper Plant]] |
||
| − | File:Crescendo-khii.jpg|[[Crescendo]] |
||
| − | File:Trickmaster.PNG|'''[[Trickmaster]]''' |
||
| − | </gallery> |
||
| − | |} |
||
| − | === |
+ | ===''Coded''=== |
| + | {{section}} |
||
| − | {|class="wikitable" width="100%" |
||
| − | |- bgcolor="#6495ED" |
||
| − | |rowspan="2" width="10%" style="text-align:center"|'''World''' |
||
| − | |rowspan="2" width="25%" style="text-align:center"|'''Description''' |
||
| − | |colspan="2" style="text-align:center"|'''Cards''' |
||
| − | |colspan="2" style="text-align:center"|'''Treasures''' |
||
| − | |rowspan="2" width="25%" style="text-align:center"|'''Journal''' |
||
| − | |- bgcolor="#6495ED" |
||
| − | |width="10%" style="text-align:center"|'''Friend Card{{SS}}''' |
||
| − | |width="10%" style="text-align:center"|'''Enemy Card{{RR}}''' |
||
| − | |width="10%" style="text-align:center"|'''Bounty''' |
||
| − | |width="10%" style="text-align:center"|'''Reward''' |
||
| − | |- bgcolor="#E6E6FA" |
||
| − | |rowspan="3" style="text-align:center"|[[File:Olympus Coliseum 2 (card).png]]<br><small>'''[[Olympus Coliseum#Kingdom Hearts: Chain of Memories|Olympus Coliseum]]'''</small> |
||
| − | |rowspan="3"|''A legendary arena where heroes test their might.''<br> |
||
| − | <small>Can be used on: |
||
| − | *'''Sora's Story''': Floors 2 through 6 |
||
| − | *'''Reverse/Rebirth''': Basement floors 7 through 4</small> |
||
| − | |style="text-align:center"| |
||
| − | |style="text-align:center"|[[File:Powerwild (card).png]]<br><small>'''[[Powerwild]]'''</small> |
||
| − | |style="text-align:center"|<small>'''[[Blizzard Raid]]'''</small> |
||
| − | |style="text-align:center"|[[File:Hi-Potion (card).png]]<br><small>'''[[Hi-Potion]]'''</small><br>[[File:Cloud (card).png]]<br><small>'''[[Cloud]]'''</small> |
||
| − | |rowspan="3"|<small>''Sora wanted to take on Hercules, so we all decided to compete in the games.<br><br>Hades, frantic to dispose of Hercules, hired Cloud to take him out. Cloud cooperated, thinking he would get his lost memories back.<br><br>But not even Cloud could beat Hercules. Hades stepped in to finish the job, but we put his plans on ice.''</small> |
||
| − | |- bgcolor="#6495ED" |
||
| − | |style="text-align:center"|'''Attack Card''' |
||
| − | |style="text-align:center"|'''Boss Card''' |
||
| − | |style="text-align:center"|'''Bonus 1''' |
||
| − | |style="text-align:center"|'''Bonus 2''' |
||
| − | |- bgcolor="#E6E6FA" |
||
| − | |style="text-align:center"|[[File:Olympia (card).png]]<br><small>'''[[Olympia]]'''</small> |
||
| − | |style="text-align:center"|[[File:Hades (card).png]]<br><small>'''[[Hades]]'''</small> |
||
| − | |style="text-align:center"|[[File:Metal Chocobo (card).png]]<br><small>'''[[Metal Chocobo]]'''</small> |
||
| − | |style="text-align:center"|[[File:Monochrome (card).png]]<br><small>'''[[Monochrome]]'''</small> |
||
| − | |- bgcolor="#6495ED" |
||
| − | |colspan="2" style="text-align:center"|'''Characters''' |
||
| − | |colspan="5" style="text-align:center"|'''Enemies''' |
||
| − | |- bgcolor="#E6E6FA" |
||
| − | |colspan="2" style="text-align:center"|<gallery widths="30px" heights="50px" perrow="4"> |
||
| − | File:Hercules KHREC.png|[[Hercules]] |
||
| − | File:Phil KHREC.png|[[Philoctetes]] |
||
| − | File:Hades KHREC.png|[[Hades]] |
||
| − | File:KH - ReCoded - Cloud.PNG|[[Cloud]] |
||
| − | </gallery> |
||
| − | |colspan="5" style="text-align:center"|<gallery widths="30px" heights="50px" perrow="7"> |
||
| − | File:Cloud Journal Entry KH.png|'''[[Cloud (Boss)|Cloud]]''' |
||
| − | File:Hades BBS.png|'''[[Hades (Boss)|Hades]]''' |
||
| − | File:Shadow (KHII).png|[[Shadow]] |
||
| − | File:Large Body KHII.png|[[Large Body]] |
||
| − | File:Blue Rhapsody.png|[[Blue Rhapsody]] |
||
| − | File:Powerwild.jpg|[[Powerwild]] |
||
| − | File:Bouncywild.jpg|[[Bouncywild]] |
||
| − | File:Barrel Spider.png|[[Barrel Spider]] |
||
| − | </gallery> |
||
| − | |} |
||
| − | == |
+ | ==World cards== |
| + | Note that this does not include event rewards for defeating bosses in the halls between floors. The listed attack card also relates to the core available attack card in that world, although cards like [[Kingdom Key (Chain of Memories)|Kingdom Key]] are available everywhere, as well as some acquired from bounty rooms, some cards can only be found in a single world outside of [[Moogle Shop (Chain of Memories)|Moogle Shop]]s. |
||
| − | {|class="wikitable" width="100%" |
||
| − | |- bgcolor="#6495ED" |
||
| − | |rowspan="2" width="10%" style="text-align:center"|'''World''' |
||
| − | |rowspan="2" width="25%" style="text-align:center"|'''Description''' |
||
| − | |colspan="2" style="text-align:center"|'''Cards''' |
||
| − | |colspan="2" style="text-align:center"|'''Treasures''' |
||
| − | |rowspan="2" width="25%" style="text-align:center"|'''Journal''' |
||
| − | |- bgcolor="#6495ED" |
||
| − | |width="10%" style="text-align:center"|'''Friend Card{{SS}}''' |
||
| − | |width="10%" style="text-align:center"|'''Enemy Card{{RR}}''' |
||
| − | |width="10%" style="text-align:center"|'''Bounty''' |
||
| − | |width="10%" style="text-align:center"|'''Reward''' |
||
| − | |- bgcolor="#E6E6FA" |
||
| − | |rowspan="3" style="text-align:center"|[[File:Agrabah 2 (card).png]]<br><small>'''[[Agrabah#Kingdom Hearts: Chain of Memories|Agrabah]]'''</small> |
||
| − | |rowspan="3"|''A bustling desert city with a grand palace.''<br> |
||
| − | <small>Can be used on: |
||
| − | *'''Sora's Story''': Floors 2 through 6 |
||
| − | *'''Reverse/Rebirth''': Basement floors 11 through 8</small> |
||
| − | |style="text-align:center"|[[File:Aladdin (card).png]]<br><small>'''[[Aladdin]]'''</small> |
||
| − | |style="text-align:center"|[[File:Fat Bandit (card).png]]<br><small>'''[[Fat Bandit]]'''</small> |
||
| − | |style="text-align:center"|[[File:Gravity (card).png]]<br><small>'''[[Gravity]]'''</small> |
||
| − | |style="text-align:center"|[[File:Ether (card).png]]<br><small>'''[[Ether]]'''</small><br>[[File:Genie (card).png]]<br><small>'''[[Genie]]'''</small> |
||
| − | |rowspan="3"|<small>''Aladdin brought the magic lamp back from the Cave of Wonders, hoping for a chance to meet Jasmine, Princess of Agrabah.<br><br>Inside the lamp was Genie, who would grant three wishes to the lamp's bearer.<br><br>Aladdin hoped to become a prince so he could see Jasmine whenever he wanted. But he used two wishes battling the Heartless, and then Jafar stole the lamp.<br><br>Jafar turned into a genie, but we defeated him and Aladdin got the lamp back.<br><br>Instead of becoming a prince, Aladdin used his last wish to set Genie free, and decided he wanted Jasmine to know him as he really is.''</small> |
||
| − | |- bgcolor="#6495ED" |
||
| − | |style="text-align:center"|'''Attack Card''' |
||
| − | |style="text-align:center"|'''Boss Card''' |
||
| − | |style="text-align:center"|'''Bonus 1''' |
||
| − | |style="text-align:center"|'''Bonus 2''' |
||
| − | |- bgcolor="#E6E6FA" |
||
| − | |style="text-align:center"|[[File:Three Wishes (card).png]]<br><small>'''[[Three Wishes]]'''</small> |
||
| − | |style="text-align:center"|[[File:Jafar (Genie) (card).png]]<br><small>'''[[Jafar (Genie)]]'''</small> |
||
| − | |style="text-align:center"|<small>'''[[Blazing Donald]]'''</small>{{KHCoM}}<br><small>'''[[Warp]]'''</small>{{ReCoM}} |
||
| − | |style="text-align:center"|[[File:Luxord (card).png]]<br><small>'''[[Luxord]]'''</small> |
||
| − | |- bgcolor="#6495ED" |
||
| − | |colspan="2" style="text-align:center"|'''Characters''' |
||
| − | |colspan="5" style="text-align:center"|'''Enemies''' |
||
| − | |- bgcolor="#E6E6FA" |
||
| − | |colspan="2" style="text-align:center"|<gallery widths="30px" heights="50px" perrow="4"> |
||
| − | File:Aladdin KHREC.png|[[Aladdin]] |
||
| − | File:Genie KHREC.png|[[Genie]] |
||
| − | File:Jasmine.png|[[Jasmine]] |
||
| − | File:Iago KHREC.png|[[Iago]] |
||
| − | File:Jafar KHREC.png|[[Jafar]] |
||
| − | File:Jafar (Genie) KHII.png|[[Jafar (Genie)|Jafar-Genie]] |
||
| − | </gallery> |
||
| − | |colspan="5" style="text-align:center"|<gallery widths="30px" heights="50px" perrow="7"> |
||
| − | File:Jafar (Genie) KHII.png|'''[[Jafar (Genie)|Jafar-Genie]]''' |
||
| − | File:Shadow (KHII).png|[[Shadow]] |
||
| − | File:Yellow Opera.jpg|[[Yellow Opera]] |
||
| − | File:Green Requiem.jpg|[[Green Requiem]] |
||
| − | File:Air Soldier.png|[[Air Soldier]] |
||
| − | File:Bandit.png|[[Bandit]] |
||
| − | File:Fat Bandit (KHII).png|[[Fat Bandit]] |
||
| − | File:Barrel Spider.png|[[Barrel Spider]] |
||
| − | </gallery> |
||
| − | |} |
||
| + | [[100 Acre Wood]] is not available in Reverse/Rebirth. It also does not use map cards to progress, but instead involves a series of minigames and conversations with the inhabitants. Clearing a minigame and talking to the local resident results in a new card or sleight. |
||
| − | ===Halloween Town=== |
||
| − | {|class=" |
+ | {| class="article-table" |
| + | ! rowspan=2 | World |
||
| − | |- bgcolor="#6495ED" |
||
| − | + | ! colspan=2 style="text-align:center;" | Floors |
|
| + | ! rowspan=2 | Attack card |
||
| − | |rowspan="2" width="25%" style="text-align:center"|'''Description''' |
||
| + | ! rowspan=2 | Event rewards |
||
| − | |colspan="2" style="text-align:center"|'''Cards''' |
||
| + | |- |
||
| − | |colspan="2" style="text-align:center"|'''Treasures''' |
||
| + | ! SS |
||
| − | |rowspan="2" width="25%" style="text-align:center"|'''Journal''' |
||
| + | ! R/R |
||
| − | |- bgcolor="#6495ED" |
||
| + | |- |
||
| − | |width="10%" style="text-align:center"|'''Friend Card{{SS}}''' |
||
| − | | |
+ | | style="text-align:center;" | [[File:Traverse Town 2 (card).png|50px]]<br>[[Traverse Town]] |
| + | | 1F |
||
| − | |width="10%" style="text-align:center"|'''Bounty''' |
||
| + | | B11F – B8F |
||
| − | |width="10%" style="text-align:center"|'''Reward''' |
||
| + | | — |
||
| − | |- bgcolor="#E6E6FA" |
||
| + | | [[Simba (card)|Simba]]<br>[[Wide Attack|Guard Armor]] |
||
| − | |rowspan="3" style="text-align:center"|[[File:Halloween Town 2 (card).png]]<br /><small>'''[[Halloween Town#Kingdom Hearts: Chain of Memories|Halloween Town]]'''</small> |
||
| + | |- |
||
| − | |rowspan="3"|''A terrifying town of tricks and treats.''<br /><small>Can be used on: </small>*<small>'''Sora's Story''': Floors 2 through 6 </small> |
||
| + | | style="text-align:center;" | [[File:Wonderland 2 (card).png|50px]]<br>[[Wonderland]] |
||
| − | *<small>'''Reverse/Rebirth''': Basement floors 7 through 4</small> |
||
| + | | 2F – 6F |
||
| − | |style="text-align:center"|[[File:Jack (card).png]]<br /><small>'''[[Jack Skellington|Jack]]'''</small> |
||
| + | | B7F – B4F |
||
| − | |style="text-align:center"|[[File:Wight Knight (card).png]]<br /><small>'''[[Wight Knight]]'''</small> |
||
| + | | [[Lady Luck (Chain of Memories)|Lady Luck]] |
||
| − | |style="text-align:center"|<small>'''[[Gifted Miracle]]'''</small> |
||
| + | | [[Attack Haste|Card Soldier]]<br>[[Value Break|Trickmaster]] |
||
| − | |style="text-align:center"|<small>'''[[Terror]]'''</small> |
||
| + | |- |
||
| − | |rowspan="3"|<small>''Dr. Finkelstein invented a potion that restores true memories, but it drew the Heartless to Halloween Town.<br /><br />Intrigued, Sora went with Jack to look for Sally, who had nabbed the potion because she was scared of what it could do.<br /><br />Oogie Boogie swiped the potion and downed it in a single gulp. But his true memories drove him mad with fear.<br /><br />What if true memories do that to everyone's heart? Scary.''</small> |
||
| + | | style="text-align:center;" | [[File:Olympus Coliseum 2 (card).png|50px]]<br>[[Olympus Coliseum]] |
||
| − | |- bgcolor="#6495ED" |
||
| + | | 2F – 6F |
||
| − | |style="text-align:center"|'''Attack Card''' |
||
| + | | B7F – B4F |
||
| − | |style="text-align:center"|'''Boss Card''' |
||
| + | | [[Olympia (Chain of Memories)|Olympia]] |
||
| − | |style="text-align:center"|'''Bonus 1''' |
||
| + | | [[Hi-Potion (Chain of Memories)|Hi-Potion]]<br>[[Berserk (Chain of Memories)|Hades]]<br>[[Cloud (card)|Cloud]] |
||
| − | |style="text-align:center"|'''Bonus 2''' |
||
| + | |- |
||
| − | |- bgcolor="#E6E6FA" |
||
| − | |style="text-align:center"|[[File: |
+ | | style="text-align:center;" | [[File:Agrabah 2 (card).png|50px]]<br>[[Agrabah]] |
| + | | 2F – 6F |
||
| − | |style="text-align:center"|[[File:Oogie Boogie (card).png]]<br /><small>'''[[Oogie Boogie]]'''</small> |
||
| + | | B11F – B8F |
||
| − | |style="text-align:center"|<small>'''[[Gravity Raid]]'''</small>{{KHCoM}}<br /><small>'''[[Bind]]'''</small>{{ReCoM}} |
||
| + | | [[Three Wishes (Chain of Memories)|Three Wishes]] |
||
| − | |style="text-align:center"|[[File:Bond of Flame (card).png]]<br /><small>'''[[Bond of Flame]]'''</small> |
||
| + | | [[Ether (Chain of Memories)|Ether]]<br>[[Attack Bracer|Jafar-Genie]]<br>[[Genie (card)|Genie]] |
||
| − | |- bgcolor="#6495ED" |
||
| + | |- |
||
| − | |colspan="2" style="text-align:center"|'''Characters''' |
||
| − | | |
+ | | style="text-align:center;" | [[File:Halloween Town 2 (card).png|50px]]<br>[[Halloween Town]] |
| + | | 2F – 6F |
||
| − | |- bgcolor="#E6E6FA" |
||
| + | | B7F – B4F |
||
| − | |colspan="2" style="text-align:center"|<gallery widths="30px" heights="50px" perrow="4"> |
||
| + | | [[Pumpkinhead (Chain of Memories)|Pumpkinhead]] |
||
| − | File:Sora Halloween Town KH.png|[[Vampire Form|Sora]] |
||
| + | | [[Terror]]<br>[[Regen (Chain of Memories)|Oogie Boogie]] |
||
| − | File:HalloweenTownDonald.png|[[Mummy Form|Donald Duck]] |
||
| + | |- |
||
| − | File:HalloweenTownGoofy.png|[[Frankenstein Form|Goofy]] |
||
| + | | style="text-align:center;" | [[File:Monstro 2 (card).png|50px]]<br>[[Monstro]] |
||
| − | File:Jackkh2.png|[[Jack Skellington]] |
||
| + | | 2F – 6F |
||
| − | File:Sally KHII.png|[[Sally]] |
||
| + | | B11F – B8F |
||
| − | File:Dr. Finklestein.jpg|[[Dr. Finkelstein]] |
||
| + | | [[Wishing Star (Chain of Memories)|Wishing Star]] |
||
| − | File:Oogie Boogie Render (Idle) KHII.png|[[Oogie Boogie]] |
||
| + | | [[High Jump (Chain of Memories)|High Jump]]{{note|name=remakeonly|Only in ''Re:Chain of Memories''.}}<br>[[Dispel|Parasite Cage]]<br>[[Dumbo (card)|Dumbo]] |
||
| − | </gallery> |
||
| + | |- |
||
| − | |colspan="5" style="text-align:center"|<gallery widths="30px" heights="50px" perrow="7"> |
||
| + | | style="text-align:center;" | [[File:Atlantica 2 (card).png|50px]]<br>[[Atlantica]] |
||
| − | File:Oogie Boogie KHII.png|'''[[Oogie Boogie (Boss)|Oogie Boogie]]''' |
||
| + | | 7F – 10F |
||
| − | File:Shadow HT.png|[[Shadow]] |
||
| + | | B7F – B4F |
||
| − | File:Search Ghost HT.png|[[Search Ghost]] |
||
| + | | [[Crabclaw (Chain of Memories)|Crabclaw]] |
||
| − | File:Gargoyle.jpg|[[Gargoyle]] |
||
| + | | [[Shell (Chain of Memories)|Ursula]] |
||
| − | File:Wight Knight HT.png|[[Wight Knight]] |
||
| + | |- |
||
| − | File:Creeper Plant HT.png|[[Creeper Plant]] |
||
| + | | style="text-align:center;" | [[File:Neverland 2 (card).png|50px]]<br>[[Neverland]] |
||
| − | </gallery> |
||
| + | | 7F – 10F |
||
| + | | B11F – B8F |
||
| + | | [[Fairy Harp (Chain of Memories)|Fairy Harp]] |
||
| + | | [[Glide (Chain of Memories)|Glide]]{{note|name=remakeonly}}<br>[[Second Chance (Chain of Memories)|Hook]]<br>[[Tinker Bell (card)|Tinker Bell]] |
||
| + | |- |
||
| + | | style="text-align:center;" | [[File:Hollow Bastion 2 (card).png|50px]]<br>[[Hollow Bastion]] |
||
| + | | 7F – 10F |
||
| + | | B12F |
||
| + | | [[Divine Rose (Chain of Memories)|Divine Rose]] |
||
| + | | [[Overdrive (Chain of Memories)|Dragon Maleficent]] |
||
| + | |- |
||
| + | | style="text-align:center;" | [[File:100 Acre Wood 2 (card).png|50px]]<br>[[100 Acre Wood]] |
||
| + | | 7F – 10F |
||
| + | | — |
||
| + | | colspan=4 | [[Confuse (Chain of Memories)|Confuse]], [[Spellbinder (Chain of Memories)|Spellbinder]], [[Elixir (Chain of Memories)|Elixir]], [[Idyll Romp]], and [[Bambi (card)|Bambi]]. <br> ''Chain of Memories'' only: [[Bind (Chain of Memories)|Bind]] and [[Synchro]]. <br> ''Re:Chain of Memories'' only: [[Firaga Burst (Chain of Memories)|Firaga Burst]], [[Mega-Ether (Chain of Memories)|Mega-Ether]], [[Cross-slash+]]. |
||
| + | |- |
||
| + | | style="text-align:center;" | [[File:Twilight Town 2 (card).png|50px]]<br>[[Twilight Town]] |
||
| + | | 11F |
||
| + | | B2F |
||
| + | | [[One-Winged Angel (Chain of Memories)|One-Winged Angel]]{{note|name=Marluxiafirst|Available after defeating [[Marluxia]]'s first phase.}} |
||
| + | | [[Auto-Life (Chain of Memories)|Vexen]] |
||
| + | |- |
||
| + | | style="text-align:center;" | [[File:Destiny Islands 2 (card).png|50px]]<br>[[Destiny Islands]] |
||
| + | | 12F |
||
| + | | B3F |
||
| + | | — |
||
| + | | [[Mimic|Darkside]]<br>[[Oathkeeper (Chain of Memories)|Oathkeeper]] |
||
| + | |- |
||
| + | | style="text-align:center;" | [[File:Castle Oblivion 2 (card).png|50px]]<br>[[Castle Oblivion]] |
||
| + | | 13F |
||
| + | | B1F |
||
| + | | [[Diamond Dust (Chain of Memories)|Diamond Dust]]{{note|name=Marluxiafirst}} |
||
| + | | [[Trinity Limit (Chain of Memories)|Trinity Limit]]<br>[[Quick Recovery (Chain of Memories)|Axel]]<br>[[Dash (Chain of Memories)|Larxene]]<br>[[Double Sleight|Marluxia]] |
||
|} |
|} |
||
| − | === |
+ | ===Chest rewards per world=== |
| + | Chests contents sometimes vary between the original and the remake, as well as the three versions of the remake (Japanese, English, HD version). The remake also adds an additional chest in the [[Room of Rewards]], as such the 'second chest' column is remake-only. |
||
| − | {|class="wikitable" width="100%" |
||
| + | {| class="article-table" |
||
| − | |- bgcolor="#6495ED" |
||
| − | + | ! rowspan=3 | World |
|
| − | + | ! colspan=2 style="text-align:center;" | Bounty |
|
| − | + | ! colspan=3 style="text-align:center;" | Room of Rewards |
|
| + | |- |
||
| − | |colspan="2" style="text-align:center"|'''Treasures''' |
||
| − | + | ! rowspan=2 style="text-align:center;" | ''Chain of Memories'' |
|
| + | ! rowspan=2 style="text-align:center;" | ''Re:Chain of Memories'' |
||
| − | |- bgcolor="#6495ED" |
||
| − | + | ! colspan=2 style="text-align:center;" | First chest |
|
| − | + | ! rowspan=2 style="text-align:center;" | Second chest |
|
| + | |- |
||
| − | |width="10%" style="text-align:center"|'''Bounty''' |
||
| − | + | ! style="text-align:center;" | COM |
|
| + | ! style="text-align:center;" | RECOM |
||
| − | |- bgcolor="#E6E6FA" |
||
| + | |- |
||
| − | |rowspan="3" style="text-align:center"|[[File:Monstro 2 (card).png]]<br><small>'''[[Monstro#Kingdom Hearts: Chain of Memories|Monstro]]'''</small> |
||
| + | | Traverse Town |
||
| − | |rowspan="3"|''Inside the belly of the giant whale.''<br> |
||
| + | | — |
||
| − | <small>Can be used on: |
||
| + | | [[Hidden Dragon (Chain of Memories)|Hidden Dragon]]{{note|name=ps2only|Only available in the original PS2 release of ''Re:Chain of Memories''. In the English version, this requires a completed Reverse/Rebirth file. In the Japanese version it requires a completed ''Kingdom Hearts II Final Mix'' save file.}}<br>[[Maverick Flare (Chain of Memories)|Maverick Flare]]{{note|name=1.5remix|Only available in the ''1.5 ReMIX'' re-release of ''Re:Chain of Memories'' after completing ''358/2 Days''.}} |
||
| − | *'''Sora's Story''': Floors 2 through 6 |
||
| + | | colspan=2 style="text-align:center;" | [[Lionheart (Chain of Memories)|Lionheart]] |
||
| − | *'''Reverse/Rebirth''': Basement floors 11 through 8</small> |
||
| + | | [[Saïx]]{{note|name=ps2&ps3|Available in all versions of ''Re:Chain of Memories''. In the English PS2 release it requires a completed Reverse/Rebirth save file, and in the Japanese version only; a complete ''Kingdom Hearts II Final Mix'' save file. In the ''1.5 ReMIX'' version it is available after completing ''358/2 Days''.}} |
||
| − | |style="text-align:center"| |
||
| + | |- |
||
| − | |style="text-align:center"|[[File:Search Ghost (card).png]]<br><small>'''[[Search Ghost]]'''</small> |
||
| + | | Wonderland |
||
| − | |style="text-align:center"|<small>'''[[Fire Raid]]'''</small> |
||
| − | |style="text-align:center"|[[ |
+ | | colspan=2 style="text-align:center;" | [[Stop (Chain of Memories)|Stop]] |
| + | | [[Stop Raid]] |
||
| − | |rowspan="3"|<small>''Geppetto went out looking for Pinocchio and was swallowed up by the whale Monstro. But finding Pinocchio inside filled him with joy.<br><br>But Pinocchio felt sad about running away from home and putting his father in danger, so he set off to find a way out of Monstro.<br><br>After a run-in with a big Heartless, Pinocchio had a great idea: Why not make a commotion and get Monstro to spit us out?<br><br>With our help, the plan worked, and Pinocchio and Geppetto escaped safely.''</small> |
||
| + | | [[Synchro]] |
||
| − | |- bgcolor="#6495ED" |
||
| + | | [[Quick Barrier|Xemnas]]{{note|name=ps2&ps3}} |
||
| − | |style="text-align:center"|'''Attack Card''' |
||
| + | |- |
||
| − | |style="text-align:center"|'''Boss Card''' |
||
| + | | Olympus Coliseum |
||
| − | |style="text-align:center"|'''Bonus 1''' |
||
| − | |style="text-align:center"| |
+ | | colspan=2 style="text-align:center;" | [[Blizzard Raid (Chain of Memories)|Blizzard Raid]] |
| + | | colspan=2 style="text-align:center;" | [[Metal Chocobo (Chain of Memories)|Metal Chocobo]] |
||
| − | |- bgcolor="#E6E6FA" |
||
| + | | [[Monochrome (Chain of Memories)|Monochrome]]{{note|name=ps2only}}<br>[[Total Eclipse (Chain of Memories)|Total Eclipse]]{{note|name=1.5remix}} |
||
| − | |style="text-align:center"|[[File:Wishing Star (card).png]]<br><small>'''[[Wishing Star]]'''</small> |
||
| + | |- |
||
| − | |style="text-align:center"|[[File:Parasite Cage (card).png]]<br><small>'''[[Parasite Cage]]'''</small> |
||
| + | | Agrabah |
||
| − | |style="text-align:center"|<small>'''[[Aqua Splash]]'''</small> |
||
| − | |style="text-align:center"|[[ |
+ | | colspan=2 style="text-align:center;" | [[Gravity (Chain of Memories)|Gravity]] |
| + | | [[Blazing Donald]] |
||
| − | |- bgcolor="#6495ED" |
||
| + | | [[Warp (Chain of Memories)|Warp]] |
||
| − | |colspan="2" style="text-align:center"|'''Characters''' |
||
| + | | [[Omni Break|Luxord]]{{note|name=ps2&ps3}} |
||
| − | |colspan="5" style="text-align:center"|'''Enemies''' |
||
| + | |- |
||
| − | |- bgcolor="#E6E6FA" |
||
| + | | Halloween Town |
||
| − | |colspan="2" style="text-align:center"|<gallery widths="30px" heights="50px" perrow="4"> |
||
| + | | colspan=2 style="text-align:center;" | [[Gifted Miracle]] |
||
| − | File:Pinocchio_KH.png|[[Pinocchio]] |
||
| + | | [[Gravity Raid]] |
||
| − | File:Geppetto.png|[[Geppetto]] |
||
| + | | [[Bind (Chain of Memories)|Bind]] |
||
| − | </gallery> |
||
| + | | [[Bond of Flame (Chain of Memories)|Bond of Flame]]{{note|name=ps2&ps3}} |
||
| − | |colspan="5" style="text-align:center"|<gallery widths="30px" heights="50px" perrow="7"> |
||
| + | |- |
||
| − | File:Shadow (KHII).png|[[Shadow]] |
||
| + | | Monstro |
||
| − | File:Air Soldier.png|[[Air Soldier]] |
||
| + | | colspan=2 style="text-align:center;" | [[Fire Raid (Chain of Memories)|Fire Raid]] |
||
| − | File:Large Body KHII.png|[[Large Body]] |
||
| + | | colspan=2 style="text-align:center;" | [[Aqua Splash]] |
||
| − | File:Yellow Opera.jpg|[[Yellow Opera]] |
||
| + | | [[Aero Guard|Xaldin]]{{note|name=ps2&ps3}} |
||
| − | File:Green Requiem.jpg|[[Green Requiem]] |
||
| + | |- |
||
| − | File:Barrel Spider.png|[[Barrel Spider]] |
||
| + | | Atlantica |
||
| − | File:Search Ghost-Heartless.jpg|[[Search Ghost]] |
||
| + | | colspan=2 style="text-align:center;" | [[Homing Blizzara]] <br> [[Shock Impact]] |
||
| − | File:TornadoStep.jpg|[[Tornado Step]] |
||
| + | | colspan=2 style="text-align:center;" | [[Quake (Chain of Memories)|Quake]] |
||
| − | File:Parasite Cage.png|'''[[Parasite Cage]]''' |
||
| + | | [[Water Charge|Demyx]]{{note|name=ps2&ps3}} |
||
| − | </gallery> |
||
| + | |- |
||
| + | | Neverland |
||
| + | | [[Homing Fira]] |
||
| + | | [[Teleport (Chain of Memories)|Teleport]] |
||
| + | | colspan=2 style="text-align:center;" | [[Thunder Raid (Chain of Memories)|Thunder Raid]] |
||
| + | | [[Follow the Wind (Chain of Memories)|Follow the Wind]]{{note|name=ps2only}}<br>[[Midnight Roar (Chain of Memories)|Midnight Roar]]{{note|name=1.5remix}} |
||
| + | |- |
||
| + | | Hollow Bastion |
||
| + | | [[Cross-slash+]] |
||
| + | | [[Reflect Raid]] |
||
| + | | colspan=2 style="text-align:center;" | [[Mushu (card)|Mushu]] |
||
| + | | [[Shot Charge|Xigbar]]{{note|name=ps2&ps3}} |
||
| + | |- |
||
| + | | Twilight Town |
||
| + | | [[Firaga Break]] |
||
| + | | [[Warpinator]]<br>[[Sleightblind|Ansem]]{{note|name=MarluxiaRR|Available after defeating Marluxia's first phase, provided there is a completed Reverse/Rebirth save file.}} |
||
| + | | [[Warp (Chain of Memories)|Warp]] |
||
| + | | [[Stardust Blitz]] |
||
| + | | [[Double Strike (Chain of Memories)|Roxas]]{{note|name=ps2&ps3}} |
||
| + | |- |
||
| + | | Destiny Islands |
||
| + | | colspan=2 style="text-align:center;" | [[Judgment (Chain of Memories)|Judgment]]<br>[[Confu-Strike|Zexion]]{{note|name=MarluxiaRR}} |
||
| + | | colspan=2 style="text-align:center;" | [[Megalixir (Chain of Memories)|Megalixir]] |
||
| + | | [[Photon Debugger (Chain of Memories)|Photon Debugger]]{{note|name=ps2only}}<br>[[Two Become One (Chain of Memories)|Two Become One]]{{note|name=1.5remix}} |
||
| + | |- |
||
| + | | rowspan=2 | Castle Oblivion |
||
| + | | colspan=2 style="text-align:center;" | [[Ultima Weapon (Chain of Memories)|Ultima Weapon]]{{note|name=MarluxiaRR}}<br>[[Warp Break|Lexaeus]]{{note|name=MarluxiaRR}} |
||
| + | | rowspan=2 | — |
||
| + | | rowspan=2 | [[Super Glide (Chain of Memories)|Super Glide]] |
||
| + | | rowspan=2 | [[Star Seeker (Chain of Memories)|Star Seeker]]{{note|name=ps2&ps3}} |
||
| + | |- |
||
| + | | [[Sleightblind|Ansem]]{{note|name=MarluxiaRR}} |
||
| + | | [[Raging Storm (Chain of Memories)|Raging Storm]] |
||
|} |
|} |
||
| + | ==Behind the scenes== |
||
| − | ===Atlantica=== |
||
| + | During cutscenes in ''Re:Chain of Memories'', the Destiny Islands card shows the ''Kingdom Hearts II'' design rather than the one used in ''Chain of Memories'', however, once you actually receive the card, the design from the original game is shown to be on the card instead. The reason for this is unknown. |
||
| − | {|class="wikitable" width="100%" |
||
| − | |- bgcolor="#6495ED" |
||
| − | |rowspan="2" width="10%" style="text-align:center"|'''World''' |
||
| − | |rowspan="2" width="25%" style="text-align:center"|'''Description''' |
||
| − | |colspan="2" style="text-align:center"|'''Cards''' |
||
| − | |colspan="2" style="text-align:center"|'''Treasures''' |
||
| − | |rowspan="2" width="25%" style="text-align:center"|'''Journal''' |
||
| − | |- bgcolor="#6495ED" |
||
| − | |width="10%" style="text-align:center"|'''Friend Card{{SS}}''' |
||
| − | |width="10%" style="text-align:center"|'''Enemy Card{{RR}}''' |
||
| − | |width="10%" style="text-align:center"|'''Bounty''' |
||
| − | |width="10%" style="text-align:center"|'''Reward''' |
||
| − | |- bgcolor="#E6E6FA" |
||
| − | |rowspan="3" style="text-align:center"|[[File:Atlantica 2 (card).png]]<br><small>'''[[Atlantica#Kingdom Hearts: Chain of Memories|Atlantica]]'''</small> |
||
| − | |rowspan="3"|''Undersea kingdom protected by King Triton.''<br> |
||
| − | <small>Can be used on: |
||
| − | *'''Sora's Story''': Floors 7 through 10 |
||
| − | *'''Reverse/Rebirth''': Basement floors 7 through 4</small> |
||
| − | |style="text-align:center"|[[File:Ariel (card).png]]<br><small>'''[[Ariel]]'''</small> |
||
| − | |style="text-align:center"|[[File:Sea Neon (card).png]]<br><small>'''[[Sea Neon]]'''</small> |
||
| − | |style="text-align:center"|<small>'''[[Homing Blizzara]]'''</small><br><small>'''[[Shock Impact]]'''</small> |
||
| − | |style="text-align:center"| |
||
| − | |rowspan="3"|<small>''Ariel, Princess of Atlantica, was worried about her little friend Flounder, who was nowhere to be found.<br><br>The sea witch Ursula told Ariel that Flounder was on the surface world, trapped, and King Triton's trident was the only way to save him.<br><br>Ariel was so worried, she stole the trident for Ursula, but it was all a trick—Ursula had Flounder all along.<br><br>With the trident's power Ursula became a giant, but we stopped her and Ariel resolved to apologize to her father, the king.''</small> |
||
| − | |- bgcolor="#6495ED" |
||
| − | |style="text-align:center"|'''Attack Card''' |
||
| − | |style="text-align:center"|'''Boss Card''' |
||
| − | |style="text-align:center"|'''Bonus 1''' |
||
| − | |style="text-align:center"|'''Bonus 2''' |
||
| − | |- bgcolor="#E6E6FA" |
||
| − | |style="text-align:center"|[[File:Crabclaw (card).png]]<br><small>'''[[Crabclaw]]'''</small> |
||
| − | |style="text-align:center"|[[File:Ursula (card).png]]<br><small>'''[[Ursula]]'''</small> |
||
| − | |style="text-align:center"|<small>'''[[Quake]]'''</small> |
||
| − | |style="text-align:center"|[[File:Demyx (card).png]]<br><small>'''[[Demyx]]'''</small> |
||
| − | |- bgcolor="#6495ED" |
||
| − | |colspan="2" style="text-align:center"|'''Characters''' |
||
| − | |colspan="5" style="text-align:center"|'''Enemies''' |
||
| − | |- bgcolor="#E6E6FA" |
||
| − | |colspan="2" style="text-align:center"|<gallery widths="30px" heights="50px" perrow="4"> |
||
| − | File:ArielKHII.PNG|[[Ariel]] |
||
| − | File:Sebastian.png|[[Sebastian]] |
||
| − | File:Flounder.png|[[Flounder]] |
||
| − | File:Ursula.png|[[Ursula]] |
||
| − | </gallery> |
||
| − | |colspan="5" style="text-align:center"|<gallery widths="30px" heights="50px" perrow="7"> |
||
| − | File:Gigant Ursula.png|'''[[Ursula (Boss)|Ursula]]''' |
||
| − | File:Search Ghost-Heartless.jpg|[[Search Ghost]] |
||
| − | File:Sheltering Zone.jpg|[[Sea Neon]] |
||
| − | File:Screwdiver.jpg|[[Screwdiver]] |
||
| − | File:Aquatank.png|[[Aquatank]] |
||
| − | File:Darkball.png|[[Darkball]] |
||
| − | </gallery> |
||
| − | |} |
||
| − | |||
| − | ===Neverland=== |
||
| − | {|class="wikitable" width="100%" |
||
| − | |- bgcolor="#6495ED" |
||
| − | |rowspan="2" width="10%" style="text-align:center"|'''World''' |
||
| − | |rowspan="2" width="25%" style="text-align:center"|'''Description''' |
||
| − | |colspan="2" style="text-align:center"|'''Cards''' |
||
| − | |colspan="2" style="text-align:center"|'''Treasures''' |
||
| − | |rowspan="2" width="25%" style="text-align:center"|'''Journal''' |
||
| − | |- bgcolor="#6495ED" |
||
| − | |width="10%" style="text-align:center"|'''Friend Card{{SS}}''' |
||
| − | |width="10%" style="text-align:center"|'''Enemy Card{{RR}}''' |
||
| − | |width="10%" style="text-align:center"|'''Bounty''' |
||
| − | |width="10%" style="text-align:center"|'''Reward''' |
||
| − | |- bgcolor="#E6E6FA" |
||
| − | |rowspan="3" style="text-align:center"|[[File:Neverland 2 (card).png]]<br><small>'''[[Neverland#Kingdom Hearts: Chain of Memories|Neverland]]'''</small> |
||
| − | |rowspan="3"|''Inside Captain Hook's pirate ship.''<br> |
||
| − | <small>Can be used on: |
||
| − | *'''Sora's Story''': Floors 7 through 10 |
||
| − | *'''Reverse/Rebirth''': Basement floors 11 through 8</small> |
||
| − | |style="text-align:center"|[[File:Peter Pan (card).png]]<br><small>'''[[Peter Pan]]'''</small> |
||
| − | |style="text-align:center"|[[File:Pirate (card).png]]<br><small>'''[[Pirate]]'''</small> |
||
| − | |style="text-align:center"|<small>'''[[Homing Fira]]'''</small>{{KHCoM}}<br><small>'''[[Teleport]]'''</small> |
||
| − | |style="text-align:center"|[[File:Tinker Bell (card).png]]<br><small>'''[[Tinker Bell]]'''</small> |
||
| − | |rowspan="3"|<small>''Peter Pan stowed away on Captain Hook's ship to save the kidnapped Wendy.<br><br>But no sooner had she been saved than Wendy told Peter she wanted to go home to London.<br><br>Would Wendy grow up and forget about him and Neverland? Peter didn't like that one bit, and left in a huff.<br><br>Meanwhile, we were just trying to get off the ship. Hook caught us on the deck, but Peter came back and bailed us out.<br><br>In the end, Peter and Wendy said their farewells, but promised to meet again one day.''</small> |
||
| − | |- bgcolor="#6495ED" |
||
| − | |style="text-align:center"|'''Attack Card''' |
||
| − | |style="text-align:center"|'''Boss Card''' |
||
| − | |style="text-align:center"|'''Bonus 1''' |
||
| − | |style="text-align:center"|'''Bonus 2''' |
||
| − | |- bgcolor="#E6E6FA" |
||
| − | |style="text-align:center"|[[File:Fairy Harp (card).png]]<br><small>'''[[Fairy Harp]]'''</small> |
||
| − | |style="text-align:center"|[[File:Captain Hook (card).png]]<br><small>'''[[Hook]]'''</small> |
||
| − | |style="text-align:center"|<small>'''[[Thunder Raid]]'''</small> |
||
| − | |style="text-align:center"|[[File:Follow the Wind (card).png]]<br><small>'''[[Follow the Wind]]'''</small> |
||
| − | |- bgcolor="#6495ED" |
||
| − | |colspan="2" style="text-align:center"|'''Characters''' |
||
| − | |colspan="5" style="text-align:center"|'''Enemies''' |
||
| − | |- bgcolor="#E6E6FA" |
||
| − | |colspan="2" style="text-align:center"|<gallery widths="30px" heights="50px" perrow="4"> |
||
| − | File:Peter Pan.png|[[Peter Pan]] |
||
| − | File:Tinkerbell.png|[[Tinker Bell]] |
||
| − | File:Wendy.png|[[Wendy]] |
||
| − | File:Captain Hook.png|[[Hook]] |
||
| − | </gallery> |
||
| − | |colspan="5" style="text-align:center"|<gallery widths="30px" heights="50px" perrow="7"> |
||
| − | File:Captain Hook KHI.png|'''[[Captain Hook (Boss)|Hook]]''' |
||
| − | File:Shadow (KHII).png|[[Shadow]] |
||
| − | File:Yellow Opera.jpg|[[Yellow Opera]] |
||
| − | File:Barrel Spider.png|[[Barrel Spider]] |
||
| − | File:Pirate-Heartless.jpg|[[Pirate]] |
||
| − | File:AirPirate KHII.png|[[Air Pirate]] |
||
| − | File:Darkball.png|[[Darkball]] |
||
| − | File:Crescendo-khii.jpg|[[Crescendo]] |
||
| − | </gallery> |
||
| − | |} |
||
| − | |||
| − | ===Hollow Bastion=== |
||
| − | {|class="wikitable" width="100%" |
||
| − | |- bgcolor="#6495ED" |
||
| − | |rowspan="2" width="10%" style="text-align:center"|'''World''' |
||
| − | |rowspan="2" width="25%" style="text-align:center"|'''Description''' |
||
| − | |colspan="2" style="text-align:center"|'''Cards''' |
||
| − | |colspan="2" style="text-align:center"|'''Treasures''' |
||
| − | |rowspan="2" width="25%" style="text-align:center"|'''Journal''' |
||
| − | |- bgcolor="#6495ED" |
||
| − | |width="10%" style="text-align:center"|'''Friend Card{{SS}}''' |
||
| − | |width="10%" style="text-align:center"|'''Enemy Card{{RR}}''' |
||
| − | |width="10%" style="text-align:center"|'''Bounty''' |
||
| − | |width="10%" style="text-align:center"|'''Reward''' |
||
| − | |- bgcolor="#E6E6FA" |
||
| − | |rowspan="3" style="text-align:center"|[[File:Hollow Bastion 2 (card).png]]<br><small>'''[[Hollow Bastion#Kingdom Hearts: Chain of Memories|Hollow Bastion]]'''</small> |
||
| − | |rowspan="3"|''A once peaceful castle ruined by Maleficent.''<br> |
||
| − | <small>Can be used on: |
||
| − | *'''Sora's Story''': Floors 7 through 10 |
||
| − | *'''Reverse/Rebirth''': Basement floor 12</small> |
||
| − | |style="text-align:center"|[[File:Beast (card).png]]<br><small>'''[[Beast]]'''</small> |
||
| − | |style="text-align:center"|[[File:Defender (card).png]]<br><small>'''[[Defender]]'''</small> |
||
| − | |style="text-align:center"|<small>'''[[Reflect Raid]]'''</small><br><small>'''[[Cross-slash+]]{{KHCoM}}'''</small> |
||
| − | |style="text-align:center"| |
||
| − | |rowspan="3"|<small>''The Beast came to rescue Belle from Maleficent's clutches, but to his dismay, Belle acted coldly and would not go with him.<br><br>We felt bad for him, so we went to see Belle. It turned out she was only pretending to be cruel, to keep her heart and the love within safe from Maleficent.<br><br>But faced with a choice, Belle couldn't hide how she felt for the Beast, and Maleficent stole her heart.<br><br>Together with the Beast, we took care of Maleficent and restored Belle's heart.''</small> |
||
| − | |- bgcolor="#6495ED" |
||
| − | |style="text-align:center"|'''Attack Card''' |
||
| − | |style="text-align:center"|'''Boss Card''' |
||
| − | |style="text-align:center"|'''Bonus 1''' |
||
| − | |style="text-align:center"|'''Bonus 2''' |
||
| − | |- bgcolor="#E6E6FA" |
||
| − | |style="text-align:center"| |
||
| − | |style="text-align:center"|[[File:Maleficent (Dragon) (card).png]]<br><small>'''[[Maleficent]]'''</small> |
||
| − | |style="text-align:center"|[[File:Mushu (card).png]]<br><small>'''[[Mushu]]'''</small> |
||
| − | |style="text-align:center"|[[File:Xigbar (card).png]]<br><small>'''[[Xigbar]]'''</small> |
||
| − | |- bgcolor="#6495ED" |
||
| − | |colspan="2" style="text-align:center"|'''Characters''' |
||
| − | |colspan="5" style="text-align:center"|'''Enemies''' |
||
| − | |- bgcolor="#E6E6FA" |
||
| − | |colspan="2" style="text-align:center"|<gallery widths="30px" heights="50px" perrow="4"> |
||
| − | File:Beast.png|[[Beast]] |
||
| − | File:Belle KH.png|[[Belle]] |
||
| − | File:Maleficent_KHREC.png|[[Maleficent]] |
||
| − | File:Dragon BBS.png|[[Maleficent (Dragon)|Dragon Maleficent]] |
||
| − | </gallery> |
||
| − | |colspan="5" style="text-align:center"|<gallery widths="30px" heights="50px" perrow="7"> |
||
| − | File:Maleficent (Dragon) Action Render KHI.png|'''[[Maleficent (Dragon)|Dragon Maleficent]]''' |
||
| − | File:Shadow (KHII).png|[[Shadow]] |
||
| − | File:Darkball.png|[[Darkball]] |
||
| − | File:Wyvern.png|[[Wyvern]] |
||
| − | File:Defender.png|[[Defender]] |
||
| − | File:Wizard KH.png|[[Wizard]] |
||
| − | File:TornadoStep.jpg|[[Tornado Step]] |
||
| − | </gallery> |
||
| − | |} |
||
| − | |||
| − | ===100 Acre Wood=== |
||
| − | {|class="wikitable" width="100%" |
||
| − | |- bgcolor="#6495ED" |
||
| − | |rowspan="2" width="10%" style="text-align:center"|'''World''' |
||
| − | |rowspan="2" width="25%" style="text-align:center"|'''Description''' |
||
| − | |style="text-align:center"|'''Cards''' |
||
| − | |style="text-align:center"|'''Treasures''' |
||
| − | |rowspan="2" width="25%" style="text-align:center"|'''Journal''' |
||
| − | |- bgcolor="#6495ED" |
||
| − | |width="20%" style="text-align:center"|'''Attack Card''' |
||
| − | |width="20%" style="text-align:center"|'''Reward''' |
||
| − | |- bgcolor="#E6E6FA" |
||
| − | |style="text-align:center"|[[File:100 Acre Wood 2 (card).png]]<br><small>'''[[100 Acre Wood#Kingdom Hearts: Chain of Memories|100 Acre Wood]]'''</small> |
||
| − | |''A quiet wood resided by friendly fellows.''<br> |
||
| − | <small>Can be used on: |
||
| − | *'''Sora's Story''': Floors 7 through 10</small> |
||
| − | |style="text-align:center"|[[File:Spellbinder (card).png]]<br><small>'''[[Spellbinder]]'''</small> |
||
| − | |style="text-align:center"|<small>'''[[Bind]]'''</small>{{KHCoM}}<br><small>'''[[Confuse]]'''</small><br><small>'''[[Firaga Burst]]'''</small>{{ReCoM}}<br><small>'''[[Synchro]]'''</small>{{KHCoM}}<br><small>'''[[Idyll Romp]]'''</small>{{KHCoM}}<br><small>'''[[Cross-slash+]]'''</small>{{ReCoM}}<br>[[File:Elixir (card).png]]<br><small>'''[[Elixir]]'''</small><br>[[File:Bambi (card).png]]<br><small>'''[[Bambi]]'''</small> |
||
| − | |<small>''Pooh seemed to have lost his friends, so Sora stopped to help him look.<br><br>Maybe Sora saw something of himself in Pooh, since he's looking for friends too.''</small> |
||
| − | |- bgcolor="#6495ED" |
||
| − | |colspan="5" style="text-align:center"|'''Characters''' |
||
| − | |- bgcolor="#E6E6FA" |
||
| − | |colspan="5" style="text-align:center"|<gallery widths="30px" heights="50px" perrow="11"> |
||
| − | File:Winnie the Pooh.png|[[Winnie the Pooh]] |
||
| − | File:Piglet KHII.png|[[Piglet]] |
||
| − | File:Owl KHII.png|[[Owl]] |
||
| − | File:RooKHII.png|[[Roo]] |
||
| − | File:Eeyore KHII.png|[[Eeyore]] |
||
| − | File:Tigger KHII.png|[[Tigger]] |
||
| − | File:Rabbit KHII.png|[[Rabbit]] |
||
| − | </gallery> |
||
| − | |} |
||
| − | |||
| − | ===Twilight Town=== |
||
| − | {|class="wikitable" width="100%" |
||
| − | |- bgcolor="#6495ED" |
||
| − | |rowspan="2" width="10%" style="text-align:center"|'''World''' |
||
| − | |rowspan="2" width="25%" style="text-align:center"|'''Description''' |
||
| − | |style="text-align:center"|'''Cards''' |
||
| − | |colspan="2" style="text-align:center"|'''Treasures''' |
||
| − | |rowspan="2" width="25%" style="text-align:center"|'''Journal''' |
||
| − | |- bgcolor="#6495ED" |
||
| − | |width="20%" style="text-align:center"|'''Enemy Card{{RR}}''' |
||
| − | |width="10%" style="text-align:center"|'''Bounty''' |
||
| − | |width="10%" style="text-align:center"|'''Reward''' |
||
| − | |- bgcolor="#E6E6FA" |
||
| − | |rowspan="3" style="text-align:center"|[[File:Twilight Town 2 (card).png]]<br><small>'''[[Twilight Town#Kingdom Hearts: Chain of Memories|Twilight Town]]'''</small> |
||
| − | |rowspan="3"|''A mysterious town between light and dark.''<br> |
||
| − | <small>Can be used on: |
||
| − | *'''Sora's Story''': Floor 11 |
||
| − | *'''Reverse/Rebirth''': Basement floor 2</small> |
||
| − | |style="text-align:center"|[[File:Darkball (card).png]]<br><small>'''[[Darkball]]'''</small> |
||
| − | |style="text-align:center"|<small>'''[[Firaga Break]]'''</small>{{KHCoM}}<br><small>'''[[Warpinator]]'''</small>{{ReCoM}}<br>[[File:Ansem (card).png]]<br><small>'''[[Ansem, Seeker of Darkness|Ansem]]'''</small><ref>This is available in Sora's Story as a [[Twilight Town]] [[Bounty]], if there is a completed Reverse/Rebirth file.</ref>{{ReCoM}} |
||
| − | |style="text-align:center"| |
||
| − | |rowspan="3"|<small>''The card Vexen gave us led to a town none of us remembered.<br><br>But Sora held fast to his promise to Naminé, and we pressed on.<br><br>Speaking of which, Vexen seemed ready to say something about that, but Axel showed up, and...Well, we won't be seeing Vexen again.''</small> |
||
| − | |- bgcolor="#6495ED" |
||
| − | |style="text-align:center"|'''Boss Card''' |
||
| − | |style="text-align:center"|'''Bonus 1''' |
||
| − | |style="text-align:center"|'''Bonus 2''' |
||
| − | |- bgcolor="#E6E6FA" |
||
| − | |style="text-align:center"|[[File:Vexen (card).png]]<br><small>'''[[Vexen]]'''</small>{{SS}} |
||
| − | |style="text-align:center"|<small>'''[[Warp]]'''</small>{{KHCoM}}<br><small>'''[[Stardust Blitz]]'''</small>{{ReCoM}} |
||
| − | |style="text-align:center"|[[File:Roxas (card).png]]<br><small>'''[[Roxas]]'''</small> |
||
| − | |- bgcolor="#6495ED" |
||
| − | |colspan="6" style="text-align:center"|'''Enemies''' |
||
| − | |- bgcolor="#E6E6FA" |
||
| − | |colspan="6" style="text-align:center"|<gallery widths="30px" heights="50px" perrow="7"> |
||
| − | File:Shadow (KHII).png|[[Shadow]] |
||
| − | File:Soldier KH2.png|[[Soldier]] |
||
| − | File:Air Soldier.png|[[Air Soldier]] |
||
| − | File:Barrel Spider.png|[[Barrel Spider]] |
||
| − | File:Riku Replica.png|'''[[Riku Replica (Boss)|Riku Replica]]''' |
||
| − | File:Vexen Days.png|'''[[Vexen (Boss)|Vexen]]''' |
||
| − | </gallery> |
||
| − | |} |
||
| − | |||
| − | ===Destiny Islands=== |
||
| − | {|class="wikitable" width="100%" |
||
| − | |- bgcolor="#6495ED" |
||
| − | |rowspan="2" width="10%" style="text-align:center"|'''World''' |
||
| − | |rowspan="2" width="25%" style="text-align:center"|'''Description''' |
||
| − | |style="text-align:center"|'''Cards''' |
||
| − | |colspan="2" style="text-align:center"|'''Treasures''' |
||
| − | |rowspan="2" width="25%" style="text-align:center"|'''Journal''' |
||
| − | |- bgcolor="#6495ED" |
||
| − | |width="20%" style="text-align:center"|'''Boss Card''' |
||
| − | |width="10%" style="text-align:center"|'''Bounty''' |
||
| − | |width="10%" style="text-align:center"|'''Reward''' |
||
| − | |- bgcolor="#E6E6FA" |
||
| − | |rowspan="3" style="text-align:center"|[[File:Destiny Islands 2 (card).png]]<br><small>'''[[Destiny Islands#Kingdom Hearts: Chain of Memories|Destiny Islands]]'''</small> |
||
| − | |rowspan="3"|''Serene islands where Sora and Riku were born.''<br> |
||
| − | <small>Can be used on: |
||
| − | *'''Sora's Story''': Floor 12 |
||
| − | *'''Reverse/Rebirth''': Basement floor 3</small> |
||
| − | |rowspan="3" style="text-align:center"|[[File:Darkside (card).png]]<br><small>'''[[Darkside]]'''</small><br>[[File:Zexion (card).png]]<br><small>'''[[Zexion]]'''</small>{{RR}}{{ReCoM}} |
||
| − | |style="text-align:center"|<small>'''[[Judgment]]'''</small><br>[[File:Zexion (card).png]]<br><small>'''[[Zexion]]'''</small><ref>This is available in Sora's Story as a [[Destiny Islands]] [[Bounty]], if there is a completed Reverse/Rebirth file.</ref>{{ReCoM}} |
||
| − | |style="text-align:center"| |
||
| − | |rowspan="3"|<small>''The last card led to the place where Sora grew up.<br><br>Sora wandered the islet that was once his playground, wading through his memories to find the girl he cared for.<br><br>But when he found Naminé, she told him the bitter truth—nothing he remembered of her ever happened. ''</small> |
||
| − | |- bgcolor="#6495ED" |
||
| − | |style="text-align:center"|'''Bonus 1''' |
||
| − | |style="text-align:center"|'''Bonus 2''' |
||
| − | |- bgcolor="#E6E6FA" |
||
| − | |style="text-align:center"|[[File:Megalixir (card).png]]<br><small>'''[[Megalixir]]'''</small> |
||
| − | |style="text-align:center"|[[File:Photon Debugger (card).png]]<br><small>'''[[Photon Debugger]]'''</small> |
||
| − | |- bgcolor="#6495ED" |
||
| − | |colspan="2" style="text-align:center"|'''Characters''' |
||
| − | |colspan="4" style="text-align:center"|'''Enemies''' |
||
| − | |- bgcolor="#E6E6FA" |
||
| − | |colspan="2" style="text-align:center"|<gallery widths="30px" heights="50px" perrow="4"> |
||
| − | File:RikuKHCGI.png|[[Riku]]<!--memory Riku--> |
||
| − | File:Tidus KHREC.png|[[Tidus]] |
||
| − | File:Selphie KHREC.png|[[Selphie]] |
||
| − | File:Wakka KHREC.png|[[Wakka]] |
||
| − | </gallery> |
||
| − | |colspan="4" style="text-align:center"|<gallery widths="30px" heights="50px" perrow="7"> |
||
| − | <gallery> |
||
| − | File:Shadow (KHII).png|[[Shadow]] |
||
| − | File:Barrel Spider.png|[[Barrel Spider]] |
||
| − | File:Darkball.png|[[Darkball]] |
||
| − | File:CreeperPlant-Artwork.png|[[Creeper Plant]] |
||
| − | File:Crescendo-khii.jpg|[[Crescendo]] |
||
| − | File:TornadoStep.jpg|[[Tornado Step]] |
||
| − | File:Darkside.png|'''[[Darkside]]''' |
||
| − | File:Zexion Days.png|'''[[Zexion (Boss)|Zexion]]''' |
||
| − | </gallery> |
||
| − | |} |
||
| − | |||
| − | ===Castle Oblivion=== |
||
| − | {|class="wikitable" width="100%" |
||
| − | |- bgcolor="#6495ED" |
||
| − | |rowspan="2" width="10%" style="text-align:center"|'''World''' |
||
| − | |rowspan="2" width="25%" style="text-align:center"|'''Description''' |
||
| − | |style="text-align:center"|'''Cards''' |
||
| − | |colspan="2" style="text-align:center"|'''Treasures''' |
||
| − | |rowspan="2" width="25%" style="text-align:center"|'''Journal''' |
||
| − | |- bgcolor="#6495ED" |
||
| − | |width="20%" style="text-align:center"|'''Boss Card''' |
||
| − | |width="10%" style="text-align:center"|'''Bounty''' |
||
| − | |width="10%" style="text-align:center"|'''Reward''' |
||
| − | |- bgcolor="#E6E6FA" |
||
| − | |rowspan="3" style="text-align:center"|[[File:Castle Oblivion 2 (card).png]]<br><small>'''[[Castle Oblivion#Kingdom Hearts: Chain of Memories|Castle Oblivion]]'''</small> |
||
| − | |rowspan="3"|'''Sora's Story:''' ''The castle's top floor, where Marluxia awaits.''<br> |
||
| − | '''Reverse/Rebirth:''' ''Where the darkness in Riku's heart — and Ansem — are free.''<br> |
||
| − | <small>Can be used on: |
||
| − | *'''Sora's Story''': |
||
| − | *'''Reverse/Rebirth''': Basement floor 1</small> |
||
| − | |rowspan="3" style="text-align:center"|[[File:Axel (card).png]]<br><small>'''[[Axel]]'''</small><br>[[File:Marluxia (card).png]]<br><small>'''[[Marluxia]]'''</small> |
||
| − | |style="text-align:center"|<small>'''[[Raging Storm]]'''</small>{{ReCoM}}<br>[[File:Ultima Weapon (card).png]]<br><small>'''[[Ultima Weapon]]'''</small><ref name=RR>This is only available if there is a completed Reverse/Rebirth file.</ref><br>[[File:Lexaeus (card).png]]<br><small>'''[[Lexaeus]]'''</small><ref>This is available in Sora's Story as a [[Castle Oblivion]] [[Bounty]], if there is a completed Reverse/Rebirth file.</ref>{{ReCoM}} |
||
| − | |style="text-align:center"|<small>'''[[Trinity Limit]]'''</small> |
||
| − | |rowspan="3"|<small>''Well, we've made it to the top. and many of our memories are gone. Sora can't even recall the name of the person he cares for most.<br><br>But we've made a promise. No distance can separate us, and we'll be friends even if we can't remember it to be so.<br><br>Axel is out of the way. We just have to stop Marluxia. He ordered Naminé to wipe Sora's memory, but it doesn't matter.<br><br>Sora knows that promises don't fade as easily as memories.''</small> |
||
| − | |- bgcolor="#6495ED" |
||
| − | |style="text-align:center"|'''Bonus 1''' |
||
| − | |style="text-align:center"|'''Bonus 2''' |
||
| − | |- bgcolor="#E6E6FA" |
||
| − | |style="text-align:center"|<small>'''[[Super Glide]]'''</small>{{ReCoM}} |
||
| − | |style="text-align:center"|[[File:Star Seeker (card).png]]<br><small>'''[[Star Seeker]]'''</small> |
||
| − | |- bgcolor="#6495ED" |
||
| − | |colspan="2" style="text-align:center"|'''Characters''' |
||
| − | |colspan="4" style="text-align:center"|'''Enemies''' |
||
| − | |- bgcolor="#E6E6FA" |
||
| − | |colspan="2" style="text-align:center"|<gallery widths="30px" heights="50px" perrow="4"> |
||
| − | File:Naminerecom.png|[[Naminé]] |
||
| − | File:Riku Replica.png|[[Riku Replica]] |
||
| − | File:Axel Idle Render KHII.png|[[Axel]] |
||
| − | File:Marluxia Days.png|[[Marluxia]] |
||
| − | File:Ansem Render (Idle) KHI.png|[[Ansem, Seeker of Darkness|Ansem]] |
||
| − | </gallery> |
||
| − | |colspan="4" style="text-align:center"|<gallery widths="30px" heights="50px" perrow="7"> |
||
| − | File:Shadow (KHII).png|[[Shadow]] |
||
| − | File:Red Nocturne.png|[[Red Nocturne]] |
||
| − | File:Blue Rhapsody.png |[[Blue Rhapsody]] |
||
| − | File:Yellow Opera.jpg|[[Yellow Opera]] |
||
| − | File:Green Requiem.jpg|[[Green Requiem]] |
||
| − | File:Darkball.png|[[Darkball]] |
||
| − | File:Wyvern.png|[[Wyvern]] |
||
| − | File:Defender.png|[[Defender]] |
||
| − | File:Wizard KH.png|[[Wizard]] |
||
| − | File:Neoshadow Render KHBBS.png|[[Neoshadow]] |
||
| − | File:Ansem Render (Action) KHI.png|'''[[Ansem, Seeker of Darkness (Boss)|Ansem, Seeker of Darkness]]''' |
||
| − | File:Axel Action Render (Official) Days.png|'''[[Axel (Boss)|Axel]]''' |
||
| − | File:Marluxia Days.png|'''[[Marluxia (Boss)|Marluxia]]''' |
||
| − | </gallery> |
||
| − | |} |
||
| − | == |
+ | ==Notes== |
| + | {{notelist}} |
||
| − | *Although [[Sora]], [[Donald Duck|Donald]], and [[Goofy]] visited the world [[Deep Jungle]] in ''Kingdom Hearts'', it was not included in ''Chain of Memories'' as the estate of Edgar Rice Burroughs did not allow Disney and Square Enix to reuse the story. It appeared in early treatments for the game, though. |
||
| − | *Though Castle Oblivion as a World Card is not obtained by Sora, and does not appear in his "World Cards" menu in ''Chain of Memories'', it does appear in his "World Cards" menu in ''Re:Chain of Memories'', and even uses the image of Riku's Castle Oblivion card as its depiction. |
||
| − | *During cutscenes in ''[[Kingdom Hearts Re:Chain of Memories]]'', the Destiny Islands card shows the ''Kingdom Hearts II'' design rather than the one used in ''Kingdom Hearts: Chain of Memories'', however, once you actually receive the card, the design from the original game is shown to be on the card instead. The reason for this is unknown. |
||
| − | *These cards may be the mechanism by which the Organization takes Sora, Donald, and Goofy's memories, and may have actually been created by Naminé. Except for in Traverse Town, Sora, Goofy, and Donald seem to have lost all their memories of each world they visit before they enter them, and the cards are said to be made by using their memories. However, the gang is able to at least recognize that they've been to each world, as they comment in Twilight Town that they don't recognize it. |
||
| + | {{navbox com}} |
||
| − | ==Notes and References== |
||
| + | [[Category:Worlds in Chain of Memories| ]] |
||
| − | {{reflist|1}} |
||
| + | [[Category:Cards in Chain of Memories]] |
||
| − | [[fr:Cartes Mondes]] |
||
| − | [[Category:Kingdom Hearts: Chain of Memories]] |
||
| − | [[Category:Cards]] |
||
| − | [[Category:Articles in need of improvement]] |
||
Latest revision as of 13:49, 25 May 2023
World cards menu in Re:Chain of Memories.

World cards menu in Chain of Memories.
World cards are a type of card in Chain of Memories and its remake Re:Chain of Memories, as well as Kingdom Hearts Coded. They are created from the memories of people and can be used to transform floors from Castle Oblivion into the relevant world, although traversing through the floor still requires map cards. Almost all world cards are made by members of Organization XIII, although DiZ and Naminé were also able to make cards for Riku, and one appeared on its own to King Mickey. Naminé could also use her powers to turn a world card into another object, as she did with the card for Destiny Islands that was in Riku Replica's possession as a charm.
In coded and Re:coded, Castle Oblivion is remade in data form, and the world cards are still present, along with the Ending Cards.
History[]
Chain of Memories[]
The first card introduced in Chain of Memories was the Traverse Town world card, produced by a hooded Marluxia who sampled Sora's memories to make it. After completing and exiting Traverse Town they met with Marluxia again, until they were interrupted by Axel, with the intent to test them. Axel granted them several more world cards (Wonderland, Olympus Coliseum, Agrabah, Monstro, and Halloween Town) upon his defeat, as did Larxene (100 Acre Wood, Atlantica, Neverland, Hollow Bastion) whom they encountered on the sixth floor.
Meanwhile, the organization members planning a coup used Naminé's ability to turn the Destiny Islands world card into a fake charm for Riku Replica. Vexen later samples the memories of Roxas through Sora's heart to create a world card for Twilight Town. The last world card Sora acquired is Destiny Islands, after the final defeat of Riku Replica, when his fake charm returned to normal when in Sora's possession. Lastly, he entered the 13th floor of Castle Oblivion without a world card
During these events Riku is taken to Castle Oblivion through a Hollow Bastion world card thanks to DiZ, who pretended to be Ansem. DiZ, disguised as Ansem, taught him about his own card mechanics, before he gave him another set of world cards. DiZ later gave him another set in the entrance hall of the seventh basement floor. Riku later acquired additional world cards from King Mickey and Zexion, for Twilight Town and Destiny Islands, respectively. DiZ also gave him the Castle Oblivion card for the final basement floor, which Sora did not require on his own final floor.
Coded[]
World cards[]
Note that this does not include event rewards for defeating bosses in the halls between floors. The listed attack card also relates to the core available attack card in that world, although cards like Kingdom Key are available everywhere, as well as some acquired from bounty rooms, some cards can only be found in a single world outside of Moogle Shops.
100 Acre Wood is not available in Reverse/Rebirth. It also does not use map cards to progress, but instead involves a series of minigames and conversations with the inhabitants. Clearing a minigame and talking to the local resident results in a new card or sleight.
| World | Floors | Attack card | Event rewards | |||
|---|---|---|---|---|---|---|
| SS | R/R | |||||
 Traverse Town |
1F | B11F – B8F | — | Simba Guard Armor | ||
 Wonderland |
2F – 6F | B7F – B4F | Lady Luck | Card Soldier Trickmaster | ||
 Olympus Coliseum |
2F – 6F | B7F – B4F | Olympia | Hi-Potion Hades Cloud | ||
 Agrabah |
2F – 6F | B11F – B8F | Three Wishes | Ether Jafar-Genie Genie | ||
 Halloween Town |
2F – 6F | B7F – B4F | Pumpkinhead | Terror Oogie Boogie | ||
 Monstro |
2F – 6F | B11F – B8F | Wishing Star | High Jump[a] Parasite Cage Dumbo | ||
 Atlantica |
7F – 10F | B7F – B4F | Crabclaw | Ursula | ||
 Neverland |
7F – 10F | B11F – B8F | Fairy Harp | Glide[a] Hook Tinker Bell | ||
 Hollow Bastion |
7F – 10F | B12F | Divine Rose | Dragon Maleficent | ||
 100 Acre Wood |
7F – 10F | — | Confuse, Spellbinder, Elixir, Idyll Romp, and Bambi. Chain of Memories only: Bind and Synchro. Re:Chain of Memories only: Firaga Burst, Mega-Ether, Cross-slash+. | |||
 Twilight Town |
11F | B2F | One-Winged Angel[b] | Vexen | ||
 Destiny Islands |
12F | B3F | — | Darkside Oathkeeper | ||
 Castle Oblivion |
13F | B1F | Diamond Dust[b] | Trinity Limit Axel Larxene Marluxia | ||
Chest rewards per world[]
Chests contents sometimes vary between the original and the remake, as well as the three versions of the remake (Japanese, English, HD version). The remake also adds an additional chest in the Room of Rewards, as such the 'second chest' column is remake-only.
| World | Bounty | Room of Rewards | |||
|---|---|---|---|---|---|
| Chain of Memories | Re:Chain of Memories | First chest | Second chest | ||
| COM | RECOM | ||||
| Traverse Town | — | Hidden Dragon[c] Maverick Flare[d] |
Lionheart | Saïx[e] | |
| Wonderland | Stop | Stop Raid | Synchro | Xemnas[e] | |
| Olympus Coliseum | Blizzard Raid | Metal Chocobo | Monochrome[c] Total Eclipse[d] | ||
| Agrabah | Gravity | Blazing Donald | Warp | Luxord[e] | |
| Halloween Town | Gifted Miracle | Gravity Raid | Bind | Bond of Flame[e] | |
| Monstro | Fire Raid | Aqua Splash | Xaldin[e] | ||
| Atlantica | Homing Blizzara Shock Impact |
Quake | Demyx[e] | ||
| Neverland | Homing Fira | Teleport | Thunder Raid | Follow the Wind[c] Midnight Roar[d] | |
| Hollow Bastion | Cross-slash+ | Reflect Raid | Mushu | Xigbar[e] | |
| Twilight Town | Firaga Break | Warpinator Ansem[f] |
Warp | Stardust Blitz | Roxas[e] |
| Destiny Islands | Judgment Zexion[f] |
Megalixir | Photon Debugger[c] Two Become One[d] | ||
| Castle Oblivion | Ultima Weapon[f] Lexaeus[f] |
— | Super Glide | Star Seeker[e] | |
| Ansem[f] | Raging Storm | ||||
Behind the scenes[]
During cutscenes in Re:Chain of Memories, the Destiny Islands card shows the Kingdom Hearts II design rather than the one used in Chain of Memories, however, once you actually receive the card, the design from the original game is shown to be on the card instead. The reason for this is unknown.
Notes[]
- ↑ 1.0 1.1 Only in Re:Chain of Memories.
- ↑ 2.0 2.1 Available after defeating Marluxia's first phase.
- ↑ 3.0 3.1 3.2 3.3 Only available in the original PS2 release of Re:Chain of Memories. In the English version, this requires a completed Reverse/Rebirth file. In the Japanese version it requires a completed Kingdom Hearts II Final Mix save file.
- ↑ 4.0 4.1 4.2 4.3 Only available in the 1.5 ReMIX re-release of Re:Chain of Memories after completing 358/2 Days.
- ↑ 5.0 5.1 5.2 5.3 5.4 5.5 5.6 5.7 5.8 Available in all versions of Re:Chain of Memories. In the English PS2 release it requires a completed Reverse/Rebirth save file, and in the Japanese version only; a complete Kingdom Hearts II Final Mix save file. In the 1.5 ReMIX version it is available after completing 358/2 Days.
- ↑ 6.0 6.1 6.2 6.3 6.4 Available after defeating Marluxia's first phase, provided there is a completed Reverse/Rebirth save file.