mNo edit summary |
|||
| (48 intermediate revisions by 28 users not shown) | |||
| Line 1: | Line 1: | ||
| − | {{ |
+ | {{appearances|358}} |
| − | {{Under Construction}} |
||
{{InfoMission358 |
{{InfoMission358 |
||
|number=89 |
|number=89 |
||
| Line 13: | Line 12: | ||
|munny=x19.86 |
|munny=x19.86 |
||
|experience=x10.63 |
|experience=x10.63 |
||
| − | |clearbonus=Orichalcum<br>Diamond<br>Premium Orb ( |
+ | |clearbonus=Orichalcum<br>Diamond<br>Premium Orb (Mission Gauge filled) |
|randombonus=Aeroga Recipe (10%)<br>Gear Component D (5%)<br>Orichalcum (10%)<br>Hi-Potion (20%)<br>Hi-Ether (20%)<br>Panacea (15%)<br>None |
|randombonus=Aeroga Recipe (10%)<br>Gear Component D (5%)<br>Orichalcum (10%)<br>Hi-Potion (20%)<br>Hi-Ether (20%)<br>Panacea (15%)<br>None |
||
}} |
}} |
||
| − | '''Mission 89''' |
+ | '''Mission 89''' in ''[[Kingdom Hearts 358/2 Days]]'' sends [[Roxas]] to [[Twilight Town]] to defeat at least six giant [[Heartless]]. |
| − | ==Mission |
+ | ==Mission goal== |
| − | ===Regular |
+ | ===Regular mission=== |
Eliminate six giant Heartless. |
Eliminate six giant Heartless. |
||
| ⚫ | |||
| ⚫ | |||
| ⚫ | |||
| ⚫ | Equip plenty of [[Hi-Ether]]s and [[Mega-Ether]]s to retain spellcasting abilities throughout. Bring lots of healing items as well, this is a long mission. Head up to the '''Station Plaza''' to battle a [[Stalwart Blade]]. Simply avoid its attacks, then counterstrike while it's dazed. Cast [[Aero]] spells on it to increase stun time. |
||
| ⚫ | Enter the '''Underground Passage''' and defeat a [[Poison Plant]] near the center. Avoid its head-beating attack, then counter with [[Fire]] spells as it recovers. Descend further into the '''Tunnel''' and take out a [[Gigas Shadow]]. Use any form of magic, especially Aero or Fire, to weaken it before finishing the job. Return to the Underground Passage and take the east exit to the '''Tram Common'''. |
||
| − | === '''Extra Mission''' === |
||
| − | Eliminate seven giant Heartless. |
||
| ⚫ | |||
| ⚫ | |||
| ⚫ | |||
| ⚫ | Take the east exit from the '''Tram Common''' and through the '''Woods''' to reach the '''Old Mansion'''. There you'll fight a [[Veil Lizard]], much as you have done several times before. Hit it with Aero and [[Blizzard]] magic to bring it down faster or to make it visible again. Attack and then roll away before its spin attack connects to win the battle. |
||
| ⚫ | |||
| ⚫ | Equip plenty of Hi- |
||
| ⚫ | Return to the '''Tram Common''' and enter the southeast exit to reach the '''Sandlot'''. Although the [[Powered Armor]] is a new enemy, it fights exactly like the [[Guard Armor]]. Watch for it to jump and drop its helmet: this is your cue to unleash a barrage of attacks before it replaces its head. Attack its dismembered limbs and destroy them before it can put them back on, or it will regenerate their HP. Finally, continue attacking its head until the hollow armor gives up. |
||
| ⚫ | Enter the Underground Passage and defeat a Poison Plant near the center. Avoid its head-beating attack, then counter with Fire spells as it recovers. Descend further into the Tunnel and take out a Gigas Shadow. Use any form of magic, especially Aero, to weaken it before finishing the job. Return to the Underground Passage and take the east exit to the Tram Common. |
||
| − | |||
| ⚫ | |||
| − | |||
| ⚫ | Take the east exit from the Tram Common and through the Woods to reach the Old Mansion. There you'll fight a Veil Lizard, much as you have done several times before. Hit it with Aero and Blizzard magic to bring it down faster or to make it visible again. Attack and then roll away before its spin attack connects to win the battle. |
||
| − | |||
| ⚫ | Return to the Tram Common and enter the southeast exit to reach the Sandlot. Although the Powered Armor is a new enemy, it fights exactly like the [[Guard Armor]]. Watch for it to jump and drop its helmet |
||
| − | |||
| − | After defeating the Powered Armor, the mission should be complete, feel free to RTC if you want. However, if you wish to complete the mission guage return to the Station Plaza. Here you will find the [[Dustflier]]. The best thing to do to beat the dustflier is to memorize his pattern. His first attack he will jump towards you and land, sending out a shockwave which does a good amount of damage and can give you a status effect if you get hit by it. During the shockwave you will want to avoid him completely, mostly by gliding around. Then he will use one of three attacks. For the first of three attacks he will do a backwards filp that does a ton of damage. You will want to dodge this then fly away and hit him. The next attack he uses is an air-dash attack which doesn't do to much damage but can air- toss you. Do the same thing you did for the backflip attack. For his third he will shoot fire into the air which does a lot of damage alsom. For this one I suggest hiding behind the pillars next to the tower's doors (on the outside) because his attack usually can't hit you in that spot. It is a long and annoying process but it will work if you have enough heals (another hint is not to use attack magic on him because it is just a waste of time ad does almost no damage). |
||
| + | After defeating the Powered Armor, the mission should be complete, feel free to RTC if you want. However, if you wish to complete the mission gauge return to the '''Station Plaza'''. Here you will find the [[Dustflier]]. After you defeat the Dustflier, RTC. |
||
| + | {{main|Dustflier}} |
||
===Challenge Mission=== |
===Challenge Mission=== |
||
{{ChallengeMission |
{{ChallengeMission |
||
| − | |number= |
+ | |number=89 |
|desc=Avoid taking damage! |
|desc=Avoid taking damage! |
||
|cond3=5 or less |
|cond3=5 or less |
||
| Line 52: | Line 46: | ||
|restrict=Take 50% more damage<br>Enemy level +10 |
|restrict=Take 50% more damage<br>Enemy level +10 |
||
}} |
}} |
||
| + | As long as you know each boss's strategy and attacks, dodging them can be simple. It's not an easy mission, but with practice all three Challenge Sigils can be obtained. Equip your movement abilities ([[Haste]], [[Air Slide]], and [[Glide]]) to help with dodging. It is recommended to begin the mission by eliminating the Heartless you find most difficult to defeat without taking damage, so as to know immediately if you'll have to begin again in order to get all three sigils. Fortunately, you're not timed, so take as long as you need. Skip the Dustflier, as you'll only be needlessly risking your Sigils going up against it. |
||
| − | |||
| − | |||
{{ChallengeMission |
{{ChallengeMission |
||
| − | |number= |
+ | |number=89SP |
|desc=Earn lots of heart points! |
|desc=Earn lots of heart points! |
||
|cond3=800 or more |
|cond3=800 or more |
||
| Line 63: | Line 56: | ||
|restrict=Level capped at 60<br>No recovery magic |
|restrict=Level capped at 60<br>No recovery magic |
||
}} |
}} |
||
| + | The key here is to take out every Heartless you see quickly to keep the chain going and to nab as many [[Currency#Heart Points|Heart Points]] as possible. You're not timed so you can take as long as you need, but you have to move fast to keep the chain ring going. Equip items/weapons that have the Chain Time ability to extend the duration of the chain ring, and take out the bosses quickly. It's possible to complete this mission without facing the Dustflier, but if you know you can beat it, taking it on will nab you more Heart Points, and as long as you defeated all the other Heartless you'll easily nab all three Challenge Sigils. |
||
==Enemies== |
==Enemies== |
||
| + | ===Heartless=== |
||
<gallery> |
<gallery> |
||
| − | Image: |
+ | Image:Shadow (KHII).png|[[Shadow]] |
| − | Image: |
+ | Image:GigasShadow.png|[[Gigas Shadow]] |
| − | Image: |
+ | Image:Scarlet Tango.png|[[Scarlet Tango]] |
| − | Image: |
+ | Image:Orcus.png|[[Orcus]] |
| ⚫ | |||
Image:Poison Plant.png|[[Poison Plant]] |
Image:Poison Plant.png|[[Poison Plant]] |
||
| − | + | Image:StormBomb.png|[[Storm Bomb]] |
|
| + | Image:Possessor(boss).png|[[Possessor]] |
||
| + | File:Tricky Monkey.png|[[Tricky Monkey]] |
||
| ⚫ | |||
| + | Image:PoweredArmor.png|'''[[Powered Armor]]''' |
||
| ⚫ | |||
| + | Image:Dustflier.png|'''[[Dustflier]]''' |
||
</gallery> |
</gallery> |
||
| − | *[[Storm Bomb]] |
||
| ⚫ | |||
| − | *[[Orcus]] |
||
| − | *[[Powered Armor]] |
||
==Treasures== |
==Treasures== |
||
{|cellspacing="0" cellpadding="5" align="center" border="1" |
{|cellspacing="0" cellpadding="5" align="center" border="1" |
||
!style="background:darkred"|<font color=white>Type</font> |
!style="background:darkred"|<font color=white>Type</font> |
||
| − | !style="background:darkred"|<font color=white>Items |
+ | !style="background:darkred"|<font color=white>Items found</font> |
!width="200" style="background:darkred;"|<font color=white>Locations</font> |
!width="200" style="background:darkred;"|<font color=white>Locations</font> |
||
!width="200" style="background:darkred;"|<font color=white>Notes</font> |
!width="200" style="background:darkred;"|<font color=white>Notes</font> |
||
| − | |-style="background: |
+ | |-style="background:lightsalmon;" |
|rowspan="5"|'''Regular''' |
|rowspan="5"|'''Regular''' |
||
|[[Hi-Potion]] |
|[[Hi-Potion]] |
||
|Under the Tracks |
|Under the Tracks |
||
|Center of the room |
|Center of the room |
||
| − | |-style="background: |
+ | |-style="background:lightsalmon;" |
|[[Hi-Ether]] |
|[[Hi-Ether]] |
||
|Side Street |
|Side Street |
||
|Near the starting point. |
|Near the starting point. |
||
| − | |-style="background: |
+ | |-style="background:lightsalmon;" |
|[[Hi-Ether]] |
|[[Hi-Ether]] |
||
|Underground Passage |
|Underground Passage |
||
|North of the Poison Plant. |
|North of the Poison Plant. |
||
| − | |-style="background: |
+ | |-style="background:lightsalmon;" |
|[[Potion]] |
|[[Potion]] |
||
|Tram Common |
|Tram Common |
||
|Near the shop. |
|Near the shop. |
||
| − | |-style="background: |
+ | |-style="background:lightsalmon;" |
|[[Hi-Ether]] |
|[[Hi-Ether]] |
||
|Tram Common |
|Tram Common |
||
|On top of the tallest building. |
|On top of the tallest building. |
||
|-style="background:#FF9933;" |
|-style="background:#FF9933;" |
||
| − | |rowspan="2"|''' |
+ | |rowspan="2"|'''Synthesis''' |
|[[Gear Component D]] |
|[[Gear Component D]] |
||
|Tram Common |
|Tram Common |
||
| Line 127: | Line 123: | ||
|[[Ordeal Blazon]] |
|[[Ordeal Blazon]] |
||
|Tram Common |
|Tram Common |
||
| − | |South alcove |
+ | |South alcove (requires [[Glide]]) |
|} |
|} |
||
| + | <!-- |
||
| − | == Video Walkthrough == |
||
| − | Video walkthrough |
+ | ==Video walkthrough== |
| + | <center> |
||
| + | {|border="1" width="700" style="text-align:center; border:2px solid" |
||
| + | |style="-moz-border-radius:10px"|'''Walkthrough Part One''' |
||
| + | |style="-moz-border-radius:10px"|'''Walkthrough Part Two''' |
||
| + | |- |
||
| + | |style="border:1px solid #490081"|[[Video:358/2 M.89 Part1]] |
||
| + | |style="border:1px solid #490081"|[[Video:358/2 M.89 Part2]] |
||
| + | |} |
||
| + | </center> |
||
| + | --> |
||
{{358Missions}} |
{{358Missions}} |
||
| + | [[fr:Mission 89: Battre six Sans-cœur géants]] |
||
[[Category:Twilight Town Missions]] |
[[Category:Twilight Town Missions]] |
||
[[Category:Kingdom Hearts 358/2 Days Missions]] |
[[Category:Kingdom Hearts 358/2 Days Missions]] |
||
Latest revision as of 02:13, 31 May 2020
Mission 89 in Kingdom Hearts 358/2 Days sends Roxas to Twilight Town to defeat at least six giant Heartless.
Mission goal[]
Regular mission[]
Eliminate six giant Heartless.
Story summary[]
This mission requires Roxas to defeat five previously encountered bosses and two new Heartless.
Mission walkthrough[]
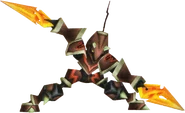
Equip plenty of Hi-Ethers and Mega-Ethers to retain spellcasting abilities throughout. Bring lots of healing items as well, this is a long mission. Head up to the Station Plaza to battle a Stalwart Blade. Simply avoid its attacks, then counterstrike while it's dazed. Cast Aero spells on it to increase stun time.
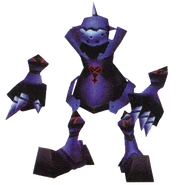
Enter the Underground Passage and defeat a Poison Plant near the center. Avoid its head-beating attack, then counter with Fire spells as it recovers. Descend further into the Tunnel and take out a Gigas Shadow. Use any form of magic, especially Aero or Fire, to weaken it before finishing the job. Return to the Underground Passage and take the east exit to the Tram Common.
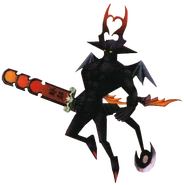
Here awaits an Orcus; stay airborne to avoid damage from most of its attacks. Watch for when it throws its sword; when this happens, dodge the sword slashes, then jump and attack as soon as the Orcus reappears. Once its HP is low, unleash a Limit Break to finish it off.
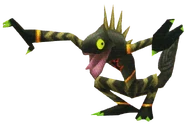
Take the east exit from the Tram Common and through the Woods to reach the Old Mansion. There you'll fight a Veil Lizard, much as you have done several times before. Hit it with Aero and Blizzard magic to bring it down faster or to make it visible again. Attack and then roll away before its spin attack connects to win the battle.
Return to the Tram Common and enter the southeast exit to reach the Sandlot. Although the Powered Armor is a new enemy, it fights exactly like the Guard Armor. Watch for it to jump and drop its helmet: this is your cue to unleash a barrage of attacks before it replaces its head. Attack its dismembered limbs and destroy them before it can put them back on, or it will regenerate their HP. Finally, continue attacking its head until the hollow armor gives up.
After defeating the Powered Armor, the mission should be complete, feel free to RTC if you want. However, if you wish to complete the mission gauge return to the Station Plaza. Here you will find the Dustflier. After you defeat the Dustflier, RTC.
Challenge Mission[]
| Challenge Mission 89 Avoid taking damage! | |
| Restrictions | |
| Take 50% more damage Enemy level +10 | |
| Grading | |
| 3 | 5 or less |
| 2 | 6-15 hits |
| 1 | 16-20 hits |
As long as you know each boss's strategy and attacks, dodging them can be simple. It's not an easy mission, but with practice all three Challenge Sigils can be obtained. Equip your movement abilities (Haste, Air Slide, and Glide) to help with dodging. It is recommended to begin the mission by eliminating the Heartless you find most difficult to defeat without taking damage, so as to know immediately if you'll have to begin again in order to get all three sigils. Fortunately, you're not timed, so take as long as you need. Skip the Dustflier, as you'll only be needlessly risking your Sigils going up against it.
| Challenge Mission 89SP Earn lots of heart points! | |
| Restrictions | |
| Level capped at 60 No recovery magic | |
| Grading | |
| 3 | 800 or more |
| 2 | 600-799 hearts |
| 1 | 210-599 hearts |
The key here is to take out every Heartless you see quickly to keep the chain going and to nab as many Heart Points as possible. You're not timed so you can take as long as you need, but you have to move fast to keep the chain ring going. Equip items/weapons that have the Chain Time ability to extend the duration of the chain ring, and take out the bosses quickly. It's possible to complete this mission without facing the Dustflier, but if you know you can beat it, taking it on will nab you more Heart Points, and as long as you defeated all the other Heartless you'll easily nab all three Challenge Sigils.
Enemies[]
Heartless[]
Treasures[]
| Type | Items found | Locations | Notes |
|---|---|---|---|
| Regular | Hi-Potion | Under the Tracks | Center of the room |
| Hi-Ether | Side Street | Near the starting point. | |
| Hi-Ether | Underground Passage | North of the Poison Plant. | |
| Potion | Tram Common | Near the shop. | |
| Hi-Ether | Tram Common | On top of the tallest building. | |
| Synthesis | Gear Component D | Tram Common | Near the entrance of the Woods. |
| Gear Component D | Station Heights | Next to the shops before the Tram Common. | |
| Badges | Unity Badge | Sandlot | Eastern wall. |
| Ordeal Badge | Station Plaza | Northeastern corner, near the station steps. | |
| Ordeal Blazon | Tram Common | South alcove (requires Glide) |

