m (→top: clean up) |
|||
| (15 intermediate revisions by 11 users not shown) | |||
| Line 1: | Line 1: | ||
| − | {{ |
+ | {{appearances|358}} |
{{InfoMission358 |
{{InfoMission358 |
||
|number = 70 |
|number = 70 |
||
| Line 12: | Line 12: | ||
|munny = x17.10 |
|munny = x17.10 |
||
|experience = x3.53 |
|experience = x3.53 |
||
| − | |clearbonus = Shining Crystal<br>Shining Gem<br> |
+ | |clearbonus = Shining Crystal<br>Shining Gem<br>Blazing Gem |
|randombonus = Elixir Recipe (10%)<br>Blazing Crystal (15%)<br>Frost Gem (15%)<br>Hi-Potion (15%)<br>Ether (15%)<br>Panacea (20%)<br>None (10%)}} |
|randombonus = Elixir Recipe (10%)<br>Blazing Crystal (15%)<br>Frost Gem (15%)<br>Hi-Potion (15%)<br>Ether (15%)<br>Panacea (20%)<br>None (10%)}} |
||
'''Mission 70''' in ''[[Kingdom Hearts 358/2 Days]]'' sends [[Roxas]] and [[Axel]] to [[Beast's Castle]] to eliminate another group of [[Deserter]]s. |
'''Mission 70''' in ''[[Kingdom Hearts 358/2 Days]]'' sends [[Roxas]] and [[Axel]] to [[Beast's Castle]] to eliminate another group of [[Deserter]]s. |
||
| Line 24: | Line 24: | ||
==Mission walkthrough== |
==Mission walkthrough== |
||
| − | Grab the |
+ | Grab the [[Slot Releaser]] from the chest behind the entrance point in the Ballroom and the [[Unity Badge]] at the eastern part of the '''[[Beast's Castle#Setting|Ballroom]]'''. After you get yourself ready, enter the Entrance Hall. The Deserters are protected by a [[Barrier Master]]. Lock on to the Barrier Master and eliminate it first, using [[Blizzard]] and [[Aero]] magic to dispatch it more quickly. Then begin eliminating Deserters by hitting them with [[Fire]] spells. |
| − | The Deserters attack when one falls. During the first few counterattacks, when there are more Deserters, run away from them until they resume "deserting." Continue killing them |
+ | The Deserters attack when one falls. During the first few counterattacks, when there are more Deserters, run away from them until they resume "deserting." Continue killing them and running away until there are only five or so left. By then, their retribution won't be so bad. Continue killing them as they gather around Roxas to finish them off. |
| − | On the way back to the corridor, an [[Invisible]] appears in the Ballroom. |
+ | On the way back to the corridor, an [[Invisible]] appears in the Ballroom. It is not mandatory to defeat the Invisible, however. Staying aerial for a good portion of the time helps avoid most of its attacks, such as its rain of purple orbs and its shockwave attack. If the Invisible is hit immediately after performing the shockwave it will be stunned for several moments thereafter, which is great time to hit it with a [[Limit Break]] or Fire spells. When it vanishes and its sword begins crisscrossing the room, you can avoid it by using [[Dodge Roll]]s. |
===Challenge Mission=== |
===Challenge Mission=== |
||
| Line 40: | Line 40: | ||
}} |
}} |
||
| − | + | As time is running, the situation gives its best, columns blocking your field of vision as you Lock On. The Barrier Master hovers at a distance, also adding more trouble to your situation. With some Aero in stock, take out a Deserter as the rest will come straight at you, giving you an opportunity to attack. Although the Invisible hovers at a distance, do not provoke it as it will only slow your time. |
|
==Enemies== |
==Enemies== |
||
| Line 46: | Line 46: | ||
<gallery> |
<gallery> |
||
Image:Deserter.png|[[Deserter]] |
Image:Deserter.png|[[Deserter]] |
||
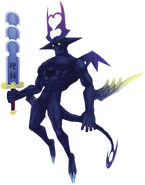
| − | + | File:Invisible KH.png|[[Invisible]] |
|
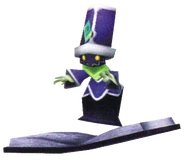
Image:Barrier_Master.png|[[Barrier Master]] |
Image:Barrier_Master.png|[[Barrier Master]] |
||
</gallery> |
</gallery> |
||
| Line 53: | Line 53: | ||
{|cellspacing="0" cellpadding="5" align="center" border="1" |
{|cellspacing="0" cellpadding="5" align="center" border="1" |
||
!style="background:darkred"|<font color=white>Type</font> |
!style="background:darkred"|<font color=white>Type</font> |
||
| − | !style="background:darkred"|<font color=white>Items |
+ | !style="background:darkred"|<font color=white>Items found</font> |
!width="200" style="background:darkred;"|<font color=white>Locations</font> |
!width="200" style="background:darkred;"|<font color=white>Locations</font> |
||
!width="200" style="background:darkred;"|<font color=white>Notes</font> |
!width="200" style="background:darkred;"|<font color=white>Notes</font> |
||
| Line 73: | Line 73: | ||
==Video walkthrough== |
==Video walkthrough== |
||
| + | |||
| − | <center> |
||
| + | {{YoutubePlayer|width=250|height=170|id=QrHWHoqaczc}} |
||
| − | {|border="1" width="700" style="text-align:center; border:2px solid" |
||
| + | {{YoutubePlayer|width=250|height=170|id=Y1qoqiwkpvw}} |
||
| − | |style="-moz-border-radius:10px"|'''Walkthrough Part One''' |
||
| + | |||
| − | |style="-moz-border-radius:10px"|'''Walkthrough Part Two''' |
||
| − | |- |
||
| − | |style="border:1px solid #490081"|<youtube>QrHWHoqaczc&feature=related</youtube> |
||
| − | |style="border:1px solid #490081"|<youtube>Y1qoqiwkpvw&feature=related</youtube> |
||
| − | |} |
||
| − | </center> |
||
{{358Missions}} |
{{358Missions}} |
||
Latest revision as of 00:59, 20 February 2020
Mission 70 in Kingdom Hearts 358/2 Days sends Roxas and Axel to Beast's Castle to eliminate another group of Deserters.
Mission goal[]
Regular mission[]
Eliminate the Deserters.
Story summary[]
Roxas and Axel are sent to Beast's Castle to eliminate a group of Deserters.
Mission walkthrough[]
Grab the Slot Releaser from the chest behind the entrance point in the Ballroom and the Unity Badge at the eastern part of the Ballroom. After you get yourself ready, enter the Entrance Hall. The Deserters are protected by a Barrier Master. Lock on to the Barrier Master and eliminate it first, using Blizzard and Aero magic to dispatch it more quickly. Then begin eliminating Deserters by hitting them with Fire spells.
The Deserters attack when one falls. During the first few counterattacks, when there are more Deserters, run away from them until they resume "deserting." Continue killing them and running away until there are only five or so left. By then, their retribution won't be so bad. Continue killing them as they gather around Roxas to finish them off.
On the way back to the corridor, an Invisible appears in the Ballroom. It is not mandatory to defeat the Invisible, however. Staying aerial for a good portion of the time helps avoid most of its attacks, such as its rain of purple orbs and its shockwave attack. If the Invisible is hit immediately after performing the shockwave it will be stunned for several moments thereafter, which is great time to hit it with a Limit Break or Fire spells. When it vanishes and its sword begins crisscrossing the room, you can avoid it by using Dodge Rolls.
Challenge Mission[]
| Challenge Mission 70 Finish in record time! | |
| Restrictions | |
| No recovery magic Take 30% more damage | |
| Grading | |
| 3 | 1:25:00 or less |
| 2 | 1:25:01-1:50:00 |
| 1 | 1:50:01-2:30:00 |
As time is running, the situation gives its best, columns blocking your field of vision as you Lock On. The Barrier Master hovers at a distance, also adding more trouble to your situation. With some Aero in stock, take out a Deserter as the rest will come straight at you, giving you an opportunity to attack. Although the Invisible hovers at a distance, do not provoke it as it will only slow your time.
Enemies[]
Heartless[]
Treasures[]
| Type | Items found | Locations | Notes |
|---|---|---|---|
| Panels | Slot Releaser | Ballroom | Behind starting point. |
| Badges | Unity Badge | Ballroom | Left of starting point |
| Ordeal Badge | Entrance Hall | Near entrance to Courtyard. |
Video walkthrough[]


