Dan da Man36 (talk | contribs) |
m (→top: clean up) |
||
| (35 intermediate revisions by 16 users not shown) | |||
| Line 1: | Line 1: | ||
| − | {{ |
+ | {{appearances|rcod}} |
| + | {{expand|create=Make pages for each of the Accessories; split off accessories and keyblades or make tables for them like [[Attack Cards]]; merge in Clock abilities; combine type and name columns in finishers, and bring all obtained columns to the standard in other pages (see [[Abilities (Kingdom Hearts II)]]}} |
||
| − | {{expand|create=Everything}} |
||
| − | {{Under Construction}} |
||
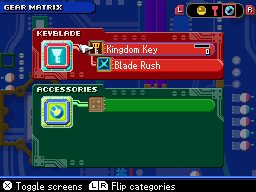
[[File:Gear_Matrix.png|thumb|The Gear Matrix with the Kingdom Key and Blade Rush equipped]] |
[[File:Gear_Matrix.png|thumb|The Gear Matrix with the Kingdom Key and Blade Rush equipped]] |
||
| − | The {{nihongo|'''Gear Matrix'''|デコレーションマトリックス|Dekorēshon Matorikkusu|lit. "Decoration Matrix"}} handles Sora's equipment, split into "Keyblade" and "Accessory." Throughout the game, Sora will gain new Keyblades that change the passive abilities he gets through the Overclock |
+ | The {{nihongo|'''Gear Matrix'''|デコレーションマトリックス|Dekorēshon Matorikkusu|lit. "Decoration Matrix"}} handles Sora's equipment, split into "Keyblade" and "Accessory." Throughout the game, Data-Sora will gain new Keyblades that change the passive abilities he gets through the Overclock program's Leveling system. By continuing to use the same Keyblade, its level will increase, unlocking more of the abilities to access from different branches. When the Clock Gauge filled the MAX Level of each branch, the "Attack" command will change into a Finish Command as set in the Keyblade section. |
| + | |||
| + | ==Mechanics== |
||
| + | Finish Commands can be obtained by exchanging SP in certain System Areas, breaking Rare Prize Blocks, or buying from the Moogle Shop. |
||
| + | |||
| + | Accessories are equipped in a similar fashion to the rest of the series, with each granting special bonuses, such as resistance to certain elements or stat boosts. More Accessory Slots can be acquired through progression on the Stat Matrix. |
||
| + | |||
| + | ==[[List of Keyblades#Kingdom Hearts Re:coded|Keyblades]]== |
||
| + | Keyblades are obtained by advancing the story, defeating bosses, destroying Rare Prize Blox and by redeeming SP in certain System Sectors. Each Keyblade has different strengths, speeds, combos, and Overclock abilities. Keyblades level up with use in battle, unlocking different Overclock abilities. |
||
| + | |||
| ⚫ | |||
| ⚫ | |||
| ⚫ | |||
| ⚫ | |||
| ⚫ | |||
| ⚫ | |||
| ⚫ | |||
| + | |''The keychain originally attached to your Keyblade. Its powers will serve you in countless battles.'' |
||
| + | |Initial Keyblade available at the start of the game. |
||
| ⚫ | |||
| ⚫ | |||
| + | |''A Keyblade that is capable of swift strikes. Its powers will automatically keep you safe.'' |
||
| + | |Defeat the [[Guard Armor]] at [[Traverse Town]]. |
||
| ⚫ | |||
| ⚫ | |||
| + | |''A Keyblade that restores HP when you block. Its powers negatively affect enemy status.'' |
||
| + | |Defeat the [[Trickmaster]] at [[Wonderland]]. |
||
| ⚫ | |||
| ⚫ | |||
| + | |''A combo-mod Keyblade capable of powerful blows. Its powers let you smash through enemy defenses.'' |
||
| + | |Defeat [[Hades]] at [[Olympus Coliseum]]. |
||
| ⚫ | |||
| ⚫ | |||
| + | |''A combo-mod Keyblade capable of a string of hits. Its powers will bring you great treasure.'' |
||
| + | |Defeat [[Jafar (Genie)|Genie Jafar]] at [[Agrabah]]. |
||
| ⚫ | |||
| ⚫ | |||
| + | |''A Keyblade that rewards wielders who share its hurt. Its powers will draw out your full potential.'' |
||
| + | |Defeat [[Data-Riku]] at [[Hollow Bastion]]. |
||
| ⚫ | |||
| ⚫ | |||
| + | |''A Keyblade newly wrought within the datascape. Its powers render all opponents helpless.'' |
||
| + | |Defeat [[Sora's Heartless]] at [[Hollow Bastion]]. |
||
| ⚫ | |||
| ⚫ | |||
| + | |''A Keyblade that will guard you from many hurts. Its powers help accelerate your growth.'' |
||
| + | |Clear [[Castle Oblivion]]. |
||
| ⚫ | |||
| ⚫ | |||
| + | |''A combo-mod Keyblade capable of crushing blows. Its powers assist those who seek supreme strength.'' |
||
| + | |Rare prize at Layer 27 of [[Olympus Coliseum]]. |
||
| ⚫ | |||
| ⚫ | |||
| + | |''A combo-mod Keyblade capable of a blur of hits. Its powers assist those who seek supreme speed.'' |
||
| + | |Sector reward for 348000 SP in sixth System Sector in [[Traverse Town]]. |
||
| ⚫ | |||
| ⚫ | |||
| + | |''An incredible Keyblade with a wealth of abilities. Its powers let you fell enemies at a single stroke.'' |
||
| + | |Sector reward for 1500000 SP in second System Sector in [[Hollow Bastion]]. |
||
| ⚫ | |||
| + | |||
| + | ==Accessories== |
||
| + | {{Main|List of Accessories (Kingdom Hearts Re:coded)}} |
||
| + | |||
| + | Accessories can be obtained by redeeming SP in various System Sectors or by completing various quests. The initial amount of accessories that can be equipped is one, but by hooking up chips to Accessory Expansions in the [[Stat Matrix]], up to three additional slots can be unlocked, and as a result, up to four accessories can be equipped at any one time. |
||
| + | |||
| + | ==Finish commands== |
||
| + | Finish commands are obtained by completing various tasks, and only one can be equipped at any time. They are split into three types; '''Type A''', '''Type B''', and '''Type C'''. '''Type A''' Finish Commands are marked with a light blue "X" symbol, '''Type B''' Finish commands with a red one, and '''Type C''' ones with a purple symbol. '''Type A''' Finish commands are performed by pressing {{icon|nintendo|a}} when prompted, and require no further interaction from the player. '''Type B''' Finish Commands are performed by pressing {{icon|nintendo|a}} when prompted, followed by pressing various buttons at specific times. '''Type C''' Finish commands are performed by pressing {{icon|nintendo|a}} when prompted, followed by using the D-Pad to aim, and tapping {{icon|nintendo|a}} repeatedly. |
||
| − | ==Overclock Finishers== |
||
{|class="wikitable" width="100%" |
{|class="wikitable" width="100%" |
||
|-bgcolor="#87ceeb" |
|-bgcolor="#87ceeb" |
||
| Line 16: | Line 81: | ||
|{{nihongo|'''[[Blade Rush]]'''|ラッシュブレード|<br>Rasshu Burēdo|lit. Rush Blade}} |
|{{nihongo|'''[[Blade Rush]]'''|ラッシュブレード|<br>Rasshu Burēdo|lit. Rush Blade}} |
||
|Devastate foes with a flurry of attacks. |
|Devastate foes with a flurry of attacks. |
||
| + | |Initial finisher available at the start of the game |
||
| − | |Initial |
||
|-bgcolor="#e6e6fa" |
|-bgcolor="#e6e6fa" |
||
|[[File:AFinishRCO.PNG]] '''Type A''' |
|[[File:AFinishRCO.PNG]] '''Type A''' |
||
| Line 31: | Line 96: | ||
|{{nihongo|'''[[Mega Flare]]'''|メガフレア|<br>Mega Furea}} |
|{{nihongo|'''[[Mega Flare]]'''|メガフレア|<br>Mega Furea}} |
||
|Lay waste to all foes around you by triggering a massive explosion. |
|Lay waste to all foes around you by triggering a massive explosion. |
||
| − | |Hollow Bastion |
+ | |Hollow Bastion Part I: Rare Prize Blox in Library 2 |
|-bgcolor="#e6e6fa" |
|-bgcolor="#e6e6fa" |
||
|[[File:AFinishRCO.PNG]] '''Type A''' |
|[[File:AFinishRCO.PNG]] '''Type A''' |
||
| Line 46: | Line 111: | ||
|{{nihongo|'''[[Speed Combo]]'''|クイックコンボ|<br>Kuikku Conbo|lit. Quick Combo}} |
|{{nihongo|'''[[Speed Combo]]'''|クイックコンボ|<br>Kuikku Conbo|lit. Quick Combo}} |
||
|Press the D-Pad in the directions shown to unleash an overwhelming series of attacks. |
|Press the D-Pad in the directions shown to unleash an overwhelming series of attacks. |
||
| − | |Bring [[Dewey]] back to [[Cid]] |
+ | |Traverse Town: Bring [[Dewey]] back to [[Cid]] |
|-bgcolor="#e6e6fa" |
|-bgcolor="#e6e6fa" |
||
|[[File:BFinishRCO.PNG]] '''Type B''' |
|[[File:BFinishRCO.PNG]] '''Type B''' |
||
| Line 56: | Line 121: | ||
|{{nihongo|'''[[Spinner Saw]]'''|エイミングソウ|<br>Eimingu Sou|lit. Aiming Saw}} |
|{{nihongo|'''[[Spinner Saw]]'''|エイミングソウ|<br>Eimingu Sou|lit. Aiming Saw}} |
||
|Press each button as the spinner passes through it to crash through foes with a whirlwind attack. |
|Press each button as the spinner passes through it to crash through foes with a whirlwind attack. |
||
| − | |Hollow Bastion |
+ | |Hollow Bastion Part II: Traverse Town System Sector: 3600 SP |
|-bgcolor="#e6e6fa" |
|-bgcolor="#e6e6fa" |
||
|[[File:CFinishRCO.PNG]] '''Type C''' |
|[[File:CFinishRCO.PNG]] '''Type C''' |
||
|{{nihongo|'''[[D-Fira]]'''|Dファイラ|<br>D Faira}} |
|{{nihongo|'''[[D-Fira]]'''|Dファイラ|<br>D Faira}} |
||
| − | |Use the D-Pad to aim and tap {{ |
+ | |Use the D-Pad to aim and tap {{icon|nintendo|a}} to repeatedly hammer foes with fireballs. |
|Wonderland: Aimless Path System Sector: 1800 SP |
|Wonderland: Aimless Path System Sector: 1800 SP |
||
|-bgcolor="#e6e6fa" |
|-bgcolor="#e6e6fa" |
||
|[[File:CFinishRCO.PNG]] '''Type C''' |
|[[File:CFinishRCO.PNG]] '''Type C''' |
||
|{{nihongo|'''[[D-Firaga]]'''|Dファイガ|<br>D Faiga}} |
|{{nihongo|'''[[D-Firaga]]'''|Dファイガ|<br>D Faiga}} |
||
| − | |Use the D-Pad to quickly take aim and tap {{ |
+ | |Use the D-Pad to quickly take aim and tap {{icon|nintendo|a}} to repeatedly hammer foes with fireballs. |
|Avatar Mode: Get all 99 Dalmatians from scratch cards. |
|Avatar Mode: Get all 99 Dalmatians from scratch cards. |
||
|-bgcolor="#e6e6fa" |
|-bgcolor="#e6e6fa" |
||
|[[File:CFinishRCO.PNG]] '''Type C''' |
|[[File:CFinishRCO.PNG]] '''Type C''' |
||
|{{nihongo|'''[[D-Blizzara]]'''|Dブリザラ|<br>D Burizara}} |
|{{nihongo|'''[[D-Blizzara]]'''|Dブリザラ|<br>D Burizara}} |
||
| − | |Encase yourself in ice and bowl over foes. Adjust your trajectory by holding {{ |
+ | |Encase yourself in ice and bowl over foes. Adjust your trajectory by holding {{icon|nintendo|a}} and using up and down on the D-Pad. |
| − | |Hollow Bastion |
+ | |Hollow Bastion Part I: High Tower System Sector: 1100 SP |
|-bgcolor="#e6e6fa" |
|-bgcolor="#e6e6fa" |
||
|[[File:CFinishRCO.PNG]] '''Type C''' |
|[[File:CFinishRCO.PNG]] '''Type C''' |
||
|{{nihongo|'''[[D-Blizzaga]]'''|Dブリザラ|<br>D Burizaga}} |
|{{nihongo|'''[[D-Blizzaga]]'''|Dブリザラ|<br>D Burizaga}} |
||
| − | |Encase yourself in ice and bowl over foes. Adjust your trajectory quickly by holding {{ |
+ | |Encase yourself in ice and bowl over foes. Adjust your trajectory quickly by holding {{icon|nintendo|a}} and using the D-Pad. |
|Avatar Sector: Reach 100th Floor and defeat Bug Data-Riku: 1000000 SP |
|Avatar Sector: Reach 100th Floor and defeat Bug Data-Riku: 1000000 SP |
||
|-bgcolor="#e6e6fa" |
|-bgcolor="#e6e6fa" |
||
|[[File:CFinishRCO.PNG]] '''Type C''' |
|[[File:CFinishRCO.PNG]] '''Type C''' |
||
|{{nihongo|'''[[D-Thundara]]'''|Dサンダラ|<br>D Sandara}} |
|{{nihongo|'''[[D-Thundara]]'''|Dサンダラ|<br>D Sandara}} |
||
| − | |Use the D-Pad to take aim, then press {{ |
+ | |Use the D-Pad to take aim, then press {{icon|nintendo|a}} to drop lightning on foes. Hold {{icon|nintendo|a}} to intensify the lightning. |
|Olympus Coliseum: Vestibule System Sector: 74000 SP |
|Olympus Coliseum: Vestibule System Sector: 74000 SP |
||
|-bgcolor="#e6e6fa" |
|-bgcolor="#e6e6fa" |
||
|[[File:CFinishRCO.PNG]] '''Type C''' |
|[[File:CFinishRCO.PNG]] '''Type C''' |
||
|{{nihongo|'''[[D-Thundaga]]'''|Dサンダガ|<br>D Sandaga}} |
|{{nihongo|'''[[D-Thundaga]]'''|Dサンダガ|<br>D Sandaga}} |
||
| − | |Use the D-Pad to quickly take aim, then press {{ |
+ | |Use the D-Pad to quickly take aim, then press {{icon|nintendo|a}} to drop lightning on foes. Hold {{icon|nintendo|a}} to intensify the lightning. |
| − | | |
+ | |Moogle Shop: Purchasable for 99000 munny after completing the game |
|} |
|} |
||
| − | ==Accessory abilities== |
||
| − | {{sec-stub}} |
||
| ⚫ | |||
| ⚫ | |||
| − | |width="25%" style="text-align:center"|'''Accessory''' |
||
| ⚫ | |||
| ⚫ | |||
| ⚫ | |||
| ⚫ | |||
| ⚫ | |||
| − | |'''Round Block''' |
||
| − | |Powers up your block. |
||
| − | |Destiny Islands - SP Reward from the System Sector at the Treehouse entrance. |
||
| ⚫ | |||
| ⚫ | |||
| − | |'''Block Charger''' |
||
| − | |Charge up the clock gauge by blocking. |
||
| − | |*** |
||
| ⚫ | |||
| ⚫ | |||
| − | |'''Block-Counter''' |
||
| − | |Counter attack right after you block. |
||
| − | |*** |
||
| ⚫ | |||
| ⚫ | |||
| − | |'''Command Counter''' |
||
| − | |Counter with a command right after you block. |
||
| − | |*** |
||
| ⚫ | |||
| ⚫ | |||
| − | |'''Command Payback''' |
||
| − | |Counter with a command in midair. |
||
| − | |*** |
||
| ⚫ | |||
| ⚫ | |||
| − | |'''Attack Boost''' |
||
| − | |Boosts your Strength when you are down to 25% HP. |
||
| − | |Destiny Islands - SP Reward from the System Sector at the door to the Seaside Shack. |
||
| ⚫ | |||
| ⚫ | |||
| − | |'''Magic Boost''' |
||
| − | |Boosts your Magic when you are down to 25% HP. |
||
| − | |Traverse Town - SP Reward from the System Sector at the door to the second floor of the Accessory Shop. |
||
| ⚫ | |||
| − | |[[File:AccessoryRCO.PNG]] '''Safeguard Armlet''' |
||
| − | |'''Defense Boost''' |
||
| − | |Boosts your Defense when you are down to 25% HP. |
||
| − | |Wonderland- SP Reward from the System Sector in the Bizarre Room. |
||
| ⚫ | |||
| − | |[[File:AccessoryRCO.PNG]] '''Half-Moon Armlet''' |
||
| − | |'''Half Damage''' |
||
| − | |Halves the damage you take when you are down to 25% HP. |
||
| − | |Wonderland - SP Reward from the System Sector in the Lotus Forest. |
||
| ⚫ | |||
| ⚫ | |||
| − | |'''Critical Plus''' |
||
| − | |Deal more critical hits when you are down to 25% HP. |
||
| − | |Olympus Coliseum - SP Reward from the System Sector in the Vestibule. Redeemable for 7000 SP |
||
| ⚫ | |||
| ⚫ | |||
| − | |'''Clock Boost''' |
||
| − | |Charges up the clock gauge faster when you are down to 25% HP. |
||
| − | |*** |
||
| − | |-bgcolor="#e6e6fa" |
||
| ⚫ | |||
| − | |'''Clock Saver''' |
||
| − | |Stops the clock gauge from draining while you take damage. |
||
| − | |*** |
||
| − | |-bgcolor="#e6e6fa" |
||
| − | |[[File:AccessoryRCO.PNG]] '''Immortal Charm''' |
||
| − | |'''Once More''' |
||
| − | |Lets you survive combos that would otherwise finish you off. |
||
| − | |*** |
||
| − | |-bgcolor="#e6e6fa" |
||
| − | |[[File:AccessoryRCO.PNG]] '''Eternity Charm''' |
||
| − | |'''Second Chance''' |
||
| − | |Lets you survive attacks that would otherwise finish you off. |
||
| − | |Castle Oblivion: Buyable for 50000 munny after completing the game. |
||
| − | |-bgcolor="#e6e6fa" |
||
| ⚫ | |||
| − | |'''No Ignite''' |
||
| − | |Prevents enemies from igniting you. |
||
| − | |Traverse Town - SP Reward from the System Sector on the floor of the Second District. |
||
| − | |-bgcolor="#e6e6fa" |
||
| − | |[[File:AccessoryRCO.PNG]] '''Blizzard Charm''' |
||
| − | |'''No Freeze''' |
||
| − | |Prevents enemies from freezing you. |
||
| − | |Traverse Town - SP Reward from the System Sector at the Hotel entrance in the Second District. |
||
| − | |-bgcolor="#e6e6fa" |
||
| − | |[[File:AccessoryRCO.PNG]] '''Thunder Charm''' |
||
| − | |'''No Jolt''' |
||
| − | |Prevents enemies from jolting you. |
||
| − | |Traverse Town - Cid's first quest |
||
| − | |-bgcolor="#e6e6fa" |
||
| − | |[[File:AccessoryRCO.PNG]] '''Heavy Charm''' |
||
| − | |'''No Air-Toss''' |
||
| − | |Prevents enemies from air-tossing you. |
||
| − | |Wonderland - Alice's second quest |
||
| − | |-bgcolor="#e6e6fa" |
||
| − | |[[File:AccessoryRCO.PNG]] '''Zip Watch''' |
||
| − | |'''No Slow''' |
||
| − | |Prevents enemies from using Slow on you. |
||
| − | |Traverse Town - SP Reward from the System Sector at the door marked with a flame in the Third District. |
||
| − | |-bgcolor="#e6e6fa" |
||
| − | |[[File:AccessoryRCO.PNG]] '''Compass''' |
||
| − | |'''No Flip-Foot''' |
||
| − | |Prevents enemies from flip-footing you. |
||
| − | |Wonderland - SP Reward from the System Sector in the Hedge Maze. |
||
| − | |-bgcolor="#e6e6fa" |
||
| − | |[[File:AccessoryRCO.PNG]] '''Feather Chain''' |
||
| − | |'''No Shoe-Glue''' |
||
| − | |Prevents enemies from shoe-gluing you. |
||
| − | |Destiny Islands - Selphie's first quest |
||
| − | |-bgcolor="#e6e6fa" |
||
| − | |[[File:AccessoryRCO.PNG]] '''Night Lenses''' |
||
| − | |'''No Blind''' |
||
| − | |Prevents enemies from blinding you. |
||
| − | |Agrabah - Aladdin's second quest |
||
| − | |-bgcolor="#e6e6fa" |
||
| − | |[[File:AccessoryRCO.PNG]] '''Adamant Belt''' |
||
| − | |'''No Defense Cut''' |
||
| − | |Prevents enemies from cutting your Defense. |
||
| − | |*** |
||
| − | |-bgcolor="#e6e6fa" |
||
| − | |[[File:AccessoryRCO.PNG]] '''Liberty Crown''' |
||
| − | |'''No Command Lock''' |
||
| − | |Prevents enemies from locking your commands. |
||
| − | |Olympus Coliseum - Philoctetes' third quest |
||
| − | |-bgcolor="#e6e6fa" |
||
| − | |[[File:AccessoryRCO.PNG]] '''Heat Sink Belt''' |
||
| − | |'''No Clock Rewind''' |
||
| − | |Prevents enemies from rewinding your clock. |
||
| − | |Castle Oblivion - Yuffie and Leon after obtaining all Ending Cards |
||
| ⚫ | |||
[[Category:Kingdom Hearts Re:coded]] |
[[Category:Kingdom Hearts Re:coded]] |
||
Revision as of 00:42, 20 February 2020
The Gear Matrix with the Kingdom Key and Blade Rush equipped
The Gear Matrix (デコレーションマトリックス Dekorēshon Matorikkusu?, lit. "Decoration Matrix") handles Sora's equipment, split into "Keyblade" and "Accessory." Throughout the game, Data-Sora will gain new Keyblades that change the passive abilities he gets through the Overclock program's Leveling system. By continuing to use the same Keyblade, its level will increase, unlocking more of the abilities to access from different branches. When the Clock Gauge filled the MAX Level of each branch, the "Attack" command will change into a Finish Command as set in the Keyblade section.
Mechanics
Finish Commands can be obtained by exchanging SP in certain System Areas, breaking Rare Prize Blocks, or buying from the Moogle Shop.
Accessories are equipped in a similar fashion to the rest of the series, with each granting special bonuses, such as resistance to certain elements or stat boosts. More Accessory Slots can be acquired through progression on the Stat Matrix.
Keyblades
Keyblades are obtained by advancing the story, defeating bosses, destroying Rare Prize Blox and by redeeming SP in certain System Sectors. Each Keyblade has different strengths, speeds, combos, and Overclock abilities. Keyblades level up with use in battle, unlocking different Overclock abilities.
| Name | Description | Obtained |
| File:KeybladeIconRCO.PNG Kingdom Key | The keychain originally attached to your Keyblade. Its powers will serve you in countless battles. | Initial Keyblade available at the start of the game. |
| File:KeybladeIconRCO.PNG Wishing Star | A Keyblade that is capable of swift strikes. Its powers will automatically keep you safe. | Defeat the Guard Armor at Traverse Town. |
| File:KeybladeIconRCO.PNG Lady Luck | A Keyblade that restores HP when you block. Its powers negatively affect enemy status. | Defeat the Trickmaster at Wonderland. |
| File:KeybladeIconRCO.PNG Olympia | A combo-mod Keyblade capable of powerful blows. Its powers let you smash through enemy defenses. | Defeat Hades at Olympus Coliseum. |
| File:KeybladeIconRCO.PNG Three Wishes | A combo-mod Keyblade capable of a string of hits. Its powers will bring you great treasure. | Defeat Genie Jafar at Agrabah. |
| File:KeybladeIconRCO.PNG Oblivion | A Keyblade that rewards wielders who share its hurt. Its powers will draw out your full potential. | Defeat Data-Riku at Hollow Bastion. |
| File:KeybladeIconRCO.PNG Zero/One | A Keyblade newly wrought within the datascape. Its powers render all opponents helpless. | Defeat Sora's Heartless at Hollow Bastion. |
| File:KeybladeIconRCO.PNG Oathkeeper | A Keyblade that will guard you from many hurts. Its powers help accelerate your growth. | Clear Castle Oblivion. |
| File:KeybladeIconRCO.PNG Metal Chocobo | A combo-mod Keyblade capable of crushing blows. Its powers assist those who seek supreme strength. | Rare prize at Layer 27 of Olympus Coliseum. |
| File:KeybladeIconRCO.PNG Lionheart | A combo-mod Keyblade capable of a blur of hits. Its powers assist those who seek supreme speed. | Sector reward for 348000 SP in sixth System Sector in Traverse Town. |
| File:KeybladeIconRCO.PNG Ultima Weapon | An incredible Keyblade with a wealth of abilities. Its powers let you fell enemies at a single stroke. | Sector reward for 1500000 SP in second System Sector in Hollow Bastion. |
Accessories
Accessories can be obtained by redeeming SP in various System Sectors or by completing various quests. The initial amount of accessories that can be equipped is one, but by hooking up chips to Accessory Expansions in the Stat Matrix, up to three additional slots can be unlocked, and as a result, up to four accessories can be equipped at any one time.
Finish commands
Finish commands are obtained by completing various tasks, and only one can be equipped at any time. They are split into three types; Type A, Type B, and Type C. Type A Finish Commands are marked with a light blue "X" symbol, Type B Finish commands with a red one, and Type C ones with a purple symbol. Type A Finish commands are performed by pressing ![]() when prompted, and require no further interaction from the player. Type B Finish Commands are performed by pressing
when prompted, and require no further interaction from the player. Type B Finish Commands are performed by pressing ![]() when prompted, followed by pressing various buttons at specific times. Type C Finish commands are performed by pressing
when prompted, followed by pressing various buttons at specific times. Type C Finish commands are performed by pressing ![]() when prompted, followed by using the D-Pad to aim, and tapping
when prompted, followed by using the D-Pad to aim, and tapping ![]() repeatedly.
repeatedly.
| Type | Name | Description | Obtained |
| Blade Rush (ラッシュブレード Rasshu Burēdo?, lit. Rush Blade) |
Devastate foes with a flurry of attacks. | Initial finisher available at the start of the game | |
| Energy Bomb (エナジーボム Enajī Bomu?) |
Surround yourself with orbs of light, then detonate them all at once. | Traverse Town: Item Workshop System Sector: 300 SP | |
| Faith (ホーリー Hōrī?, lit. Holy) |
Send pillars of light lancing through enemies again and again. | Agrabah: Entrance to Cave of Wonders System Sector: 600 SP | |
| Mega Flare (メガフレア Mega Furea?) |
Lay waste to all foes around you by triggering a massive explosion. | Hollow Bastion Part I: Rare Prize Blox in Library 2 | |
| Meteor Rain (メテオレイン Meteo Rein?) |
Bring countless meteors crashing down upon foes. | Destiny Islands: Secret Place System Sector: 56000 SP | |
| Zone of Ruin (ブラスティングゾーン Burasutingu Zōn?, lit. Blasting Zone) |
Summon a giant sword of light and smite enemies with one fell blow. | Agrabah: Cave of Wonders Gauntlet System Sector: 620000 SP | |
| Speed Combo (クイックコンボ Kuikku Conbo?, lit. Quick Combo) |
Press the D-Pad in the directions shown to unleash an overwhelming series of attacks. | Traverse Town: Bring Dewey back to Cid | |
| Star Rave (スターレイヴ Sutā Reivu?) |
Press each button rising up the top screen just as it overlaps the ☆ for a fierce rush of attacks. | Wonderland: Rare Prize Blox in Tea Party Garden, top of ledge | |
| Spinner Saw (エイミングソウ Eimingu Sou?, lit. Aiming Saw) |
Press each button as the spinner passes through it to crash through foes with a whirlwind attack. | Hollow Bastion Part II: Traverse Town System Sector: 3600 SP | |
| D-Fira (Dファイラ D Faira?) |
Use the D-Pad to aim and tap |
Wonderland: Aimless Path System Sector: 1800 SP | |
| D-Firaga (Dファイガ D Faiga?) |
Use the D-Pad to quickly take aim and tap |
Avatar Mode: Get all 99 Dalmatians from scratch cards. | |
| D-Blizzara (Dブリザラ D Burizara?) |
Encase yourself in ice and bowl over foes. Adjust your trajectory by holding |
Hollow Bastion Part I: High Tower System Sector: 1100 SP | |
| D-Blizzaga (Dブリザラ D Burizaga?) |
Encase yourself in ice and bowl over foes. Adjust your trajectory quickly by holding |
Avatar Sector: Reach 100th Floor and defeat Bug Data-Riku: 1000000 SP | |
| D-Thundara (Dサンダラ D Sandara?) |
Use the D-Pad to take aim, then press |
Olympus Coliseum: Vestibule System Sector: 74000 SP | |
| D-Thundaga (Dサンダガ D Sandaga?) |
Use the D-Pad to quickly take aim, then press |
Moogle Shop: Purchasable for 99000 munny after completing the game |