Coldasfire (talk | contribs) |
mNo edit summary |
||
| (11 intermediate revisions by 7 users not shown) | |||
| Line 1: | Line 1: | ||
| − | {{ |
+ | {{appearances|KH2}} |
{{Expand|create=Add rewards, strategy section for Paradox Cup.}} |
{{Expand|create=Add rewards, strategy section for Paradox Cup.}} |
||
| − | |||
<div style="float: right;" class="tabber"> |
<div style="float: right;" class="tabber"> |
||
| − | <div class="tabbertab" title="Cerberus Cup" style="float: center; background-color:white; width:370px"> |
+ | <div class="tabbertab" title="Cerberus Cup" style="float: center; background-color:white; width:370px">{{Coliseum |
| − | {{Coliseum |
||
|name=Cerberus Cup |
|name=Cerberus Cup |
||
|katakana=ケルベロスカップ |
|katakana=ケルベロスカップ |
||
| Line 33: | Line 31: | ||
|seed10=10 |
|seed10=10 |
||
|enem10=Cerberus |
|enem10=Cerberus |
||
| + | |normalname=Beneath the Ground |
||
| − | }} |
||
| + | |normalfile=Beneath the Ground KHII.ogg |
||
| ⚫ | |||
| + | |normalcomposer=Yoko Shimomura |
||
| − | {{Coliseum |
||
| + | |normalsections=Brass, Strings, Percussion |
||
| ⚫ | |||
|name=Cerberus Paradox Cup |
|name=Cerberus Paradox Cup |
||
|katakana=裏ケルベロスカップ |
|katakana=裏ケルベロスカップ |
||
| Line 42: | Line 42: | ||
|image=[[File:Cerberus Cup Trophy.png|200px]] |
|image=[[File:Cerberus Cup Trophy.png|200px]] |
||
|seeds=10 |
|seeds=10 |
||
| − | |reward=? |
||
|unlock=All Drive Forms (except Final) at level 5, unlock Pain and Panic Paradox |
|unlock=All Drive Forms (except Final) at level 5, unlock Pain and Panic Paradox |
||
|seed1=1 |
|seed1=1 |
||
| Line 64: | Line 63: | ||
|seed10=10 |
|seed10=10 |
||
|enem10=Cerberus |
|enem10=Cerberus |
||
| + | |normalname=Beneath the Ground |
||
| − | }} |
||
| + | |normalfile=Beneath the Ground KHII.ogg |
||
| ⚫ | |||
| + | |normalcomposer=Yoko Shimomura |
||
| + | |normalsections=Brass, Strings, Percussion |
||
| ⚫ | |||
The '''Cerberus Cup''' is the second cup of ''[[Kingdom Hearts II]]'' and ''[[Kingdom Hearts II Final Mix]]'', selectable only in the [[Underdrome]]. It is so-named because its final seed is a battle against the three-headed [[Cerberus]]. |
The '''Cerberus Cup''' is the second cup of ''[[Kingdom Hearts II]]'' and ''[[Kingdom Hearts II Final Mix]]'', selectable only in the [[Underdrome]]. It is so-named because its final seed is a battle against the three-headed [[Cerberus]]. |
||
| Line 109: | Line 111: | ||
<gallery> |
<gallery> |
||
File:AirPirate KHII.png|[[Air Pirate]] |
File:AirPirate KHII.png|[[Air Pirate]] |
||
| − | File: |
+ | File:Trick Ghost.png|[[Trick Ghost]] |
File:DrillerMole.png|[[Driller Mole]] |
File:DrillerMole.png|[[Driller Mole]] |
||
File:Hammer Frame render.png|[[Hammer Frame]] |
File:Hammer Frame render.png|[[Hammer Frame]] |
||
| − | File:TornadoStep. |
+ | File:TornadoStep.png|[[Tornado Step]] |
File:Wight Knight (KHII).png|[[Wight Knight]] |
File:Wight Knight (KHII).png|[[Wight Knight]] |
||
File:Silver Rock render.png|[[Silver Rock]] |
File:Silver Rock render.png|[[Silver Rock]] |
||
| Line 121: | Line 123: | ||
File:Fortuneteller.png|[[Fortuneteller]] |
File:Fortuneteller.png|[[Fortuneteller]] |
||
File:AerialKnocker-khii.png|[[Aerial Knocker]] |
File:AerialKnocker-khii.png|[[Aerial Knocker]] |
||
| − | File: |
+ | File:Cannon Gun KHII.png|[[Cannon Gun]] |
File:Toy Soldier.png|[[Toy Soldier]] |
File:Toy Soldier.png|[[Toy Soldier]] |
||
File:LunaBandit.png|[[Luna Bandit]] |
File:LunaBandit.png|[[Luna Bandit]] |
||
| Line 148: | Line 150: | ||
<gallery> |
<gallery> |
||
File:AirPirate KHII.png|[[Air Pirate]] |
File:AirPirate KHII.png|[[Air Pirate]] |
||
| − | File: |
+ | File:Trick Ghost.png|[[Trick Ghost]] |
File:DrillerMole.png|[[Driller Mole]] |
File:DrillerMole.png|[[Driller Mole]] |
||
File:Hammer Frame render.png|[[Hammer Frame]] |
File:Hammer Frame render.png|[[Hammer Frame]] |
||
| − | File:TornadoStep. |
+ | File:TornadoStep.png|[[Tornado Step]] |
File:Wight Knight (KHII).png|[[Wight Knight]] |
File:Wight Knight (KHII).png|[[Wight Knight]] |
||
File:Silver Rock render.png|[[Silver Rock]] |
File:Silver Rock render.png|[[Silver Rock]] |
||
| Line 160: | Line 162: | ||
File:Fortuneteller.png|[[Fortuneteller]] |
File:Fortuneteller.png|[[Fortuneteller]] |
||
File:AerialKnocker-khii.png|[[Aerial Knocker]] |
File:AerialKnocker-khii.png|[[Aerial Knocker]] |
||
| − | File: |
+ | File:Cannon Gun KHII.png|[[Cannon Gun]] |
File:Toy Soldier.png|[[Toy Soldier]] |
File:Toy Soldier.png|[[Toy Soldier]] |
||
File:LunaBandit.png|[[Luna Bandit]] |
File:LunaBandit.png|[[Luna Bandit]] |
||
| Line 177: | Line 179: | ||
</gallery> |
</gallery> |
||
|} |
|} |
||
| + | |||
| Line 182: | Line 185: | ||
{{Stub}} |
{{Stub}} |
||
[[fr:Coupe Cerbère]] |
[[fr:Coupe Cerbère]] |
||
| + | [[Category:Kingdom Hearts II Minigames]] |
||
| + | [[Category:Kingdom Hearts II Final Mix Minigames]] |
||
[[Category:Olympus Coliseum Cups]] |
[[Category:Olympus Coliseum Cups]] |
||
| − | [[Category:Mini-games]] |
||
Revision as of 02:13, 31 May 2020
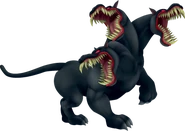
The Cerberus Cup is the second cup of Kingdom Hearts II and Kingdom Hearts II Final Mix, selectable only in the Underdrome. It is so-named because its final seed is a battle against the three-headed Cerberus.
Although the player is alone, Sora can use Drive Forms without any ally's help. Also, the Drive Gauge fills up much faster than it normally does. The match is timed, and time, though very little, is rewarded for completing each match.
The Cerberus Paradox Cup is a much more difficult version of the Cerberus Cup, with a level of 70.
Cerberus Cup
Rules
Solo fight using Sora. The Drive Gauge fills faster than usual and Sora can use Drives alone.
No experience is gained.
Strategy
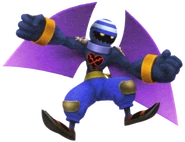
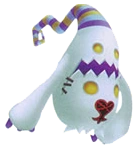
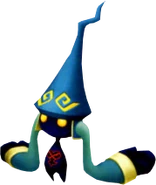
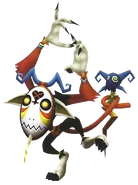
Round 1: The first battle is easy enough. The Trick Ghosts may get annoying by disappearing, but they don't pose much of a threat.
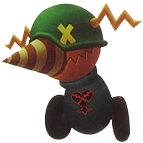
Round 2: Almost as easy as Round 1. The Driller Moles aren't much of issue, but the Hammer Frames can do a lot of damage if you're not careful. Just be sure to jump if you see one about to pound its torso into the ground.
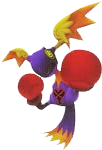
Round 3: This round can be especially bothersome. The Wight Knights and Tornado Steps spinning attacks can really deplete your HP. If you get caught in one of the Wight Knights mid-air spin attacks, either counter attack or block and then counter attack.
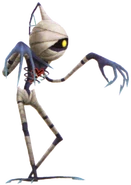
Round 4: The Silver Rocks aren't really your main problem. Your main problem this round is the brute force of the Living Bone and the Silver Rocks constantly shooting at you. Take care of the Living Bone first by blocking, dodge rolling, and using the triangle command Rodeo to take out the Silver Rocks.
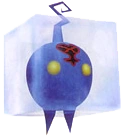
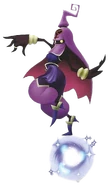
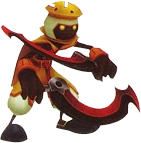
Round 5: The Shaman is really just for show, but kill it first just to get out of the way. The Icy Cubes and the Fiery Globes are vulnerable to Fire and Blizzard respectively, so be sure to use those. Or you can just spam X and be done with it, it's up to you.
Round 6: The Fortunetellers can be really annoying if you don't know how to deal with them properly. What you do is block their orb attacks so that it returns back to them, and them spam attack them. As for the Aerial Knockers, just go ahead and spam attack them as well.
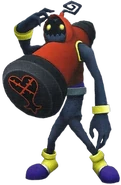
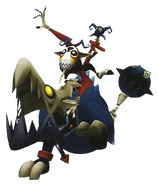
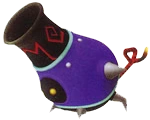
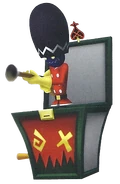
Round 7: This one is especially annoying. The Toy Soldier has a lot of health, and on top of that can deal unprecedented amounts of damage. First, attack the Cannon Guns while staying outside of the targets. The bombs they fire deal A LOT of damage, so make that your #1 priority. After the Cannon Guns are out of the way, carefully get rid of the toy soldier. You are timed, mind you, so don't take too long.
Round 8: The remainder of these rounds are in pitch black, and you can only see a small area around you and other certain things. The Luna Bandits aren't very difficult, but be careful since you can't see them very well.
Round 9: The Emerald Blues are just your average flying shooting Heartless, so nothing to worry there; except that there are a lot of them. And there's a Fat Bandit. Take care of the Emerald Blues first and then take out the Fat Bandit by going behind him when he breathes fire and dodging when he throws a fireball.
Round 10: This one is the most difficult. From a distance, you can only see its teeth. If you have it, be sure to have MP Rage. This will allow to restore MP when you get hit, meaning you don't have to heavily rely on elixirs and whatnot. You should only really attack the side heads; attacking the middle head is too dangerous. Attack the two outer heads in between bites. Dodge his other attacks by dodge rolling and/or gliding, and you should be fine. Just be ready for a fairly intense battle. Note: Wisdom and Master Forms really help finish Cerberus quickly.
Altogether: Try using Magnet-and-Thunder techniques. For this, equipping Photon Debugger for it's Thunder Boost ability will not only be powerful, but will boost your score. It is possible to get Final Form in the Cerberus Cup, but you must have first defeated Roxas. Use either Valor or Master Form until instead of red or gold, you'll see a whitish silver. Use the Drive Gauge to your advantage. Equip Drive Boost or Damage Drive if it helps.
Enemies
Heartless
Somebodies
Cerberus Paradox Cup
Enemies
Heartless
Somebodies

